Setting up an academic website - a guide for absolute beginners
Let’s say you just started a new position (maybe as a PhD student) and would like to create an academic website, as seems to be all the rage nowadays. However, are relatively new to programming, and are unsure on where to even get started. Creating a website can seem to be a daunting task, but the initial steps to creating a basic website is actually quite simple (even a numbskull like myself can do it!). This post will cover all of the steps that you need in order to create the base for an academic website using the academicpages template.

Not all programmers work like this.
Choosing which website template works for you
The first question that you should ask yourself is which template you would like to use. Two of the most popular options, at least when creating an ‘academic’ website are the academicpages template in Jekyll, or the Academic Theme in Hugo. If the words ‘Jekyll’ and ‘Hugo’ mean nothing (apart from a vague recollection of 19th century literature) then that’s ok! All you need to know is that the two look slightly different in their presentation, and that the set-up and maintenance of each website (in terms of programming) will be quite different. Both are very popular and so have plenty of guides and help available, however it is worth looking at each of the two before choosing which theme you would like.
(Of course, selecting these two themes stem from my personal preference in having a more ‘conventional’ theme, there are plenty of other alternatives to choose from!)

I ended up choosing the academicpages (Jekyll) theme, because I preferred the aesthetic, the set-up is relatively easier, and I think with Hugo the default is to have all website content on the same page, scrolling down to see additional ‘pages’, whereas on the Jekyll template, pages are actual pages (I may be wrong, and you can certainly change this). So if you also end up going for the academicpages template, read on for a guide in how to set-up your own website!
Before we get started, there are a number of great tutorials that you can use in tandem (and which my own borrows from), I would highly recommend checking them out as well!
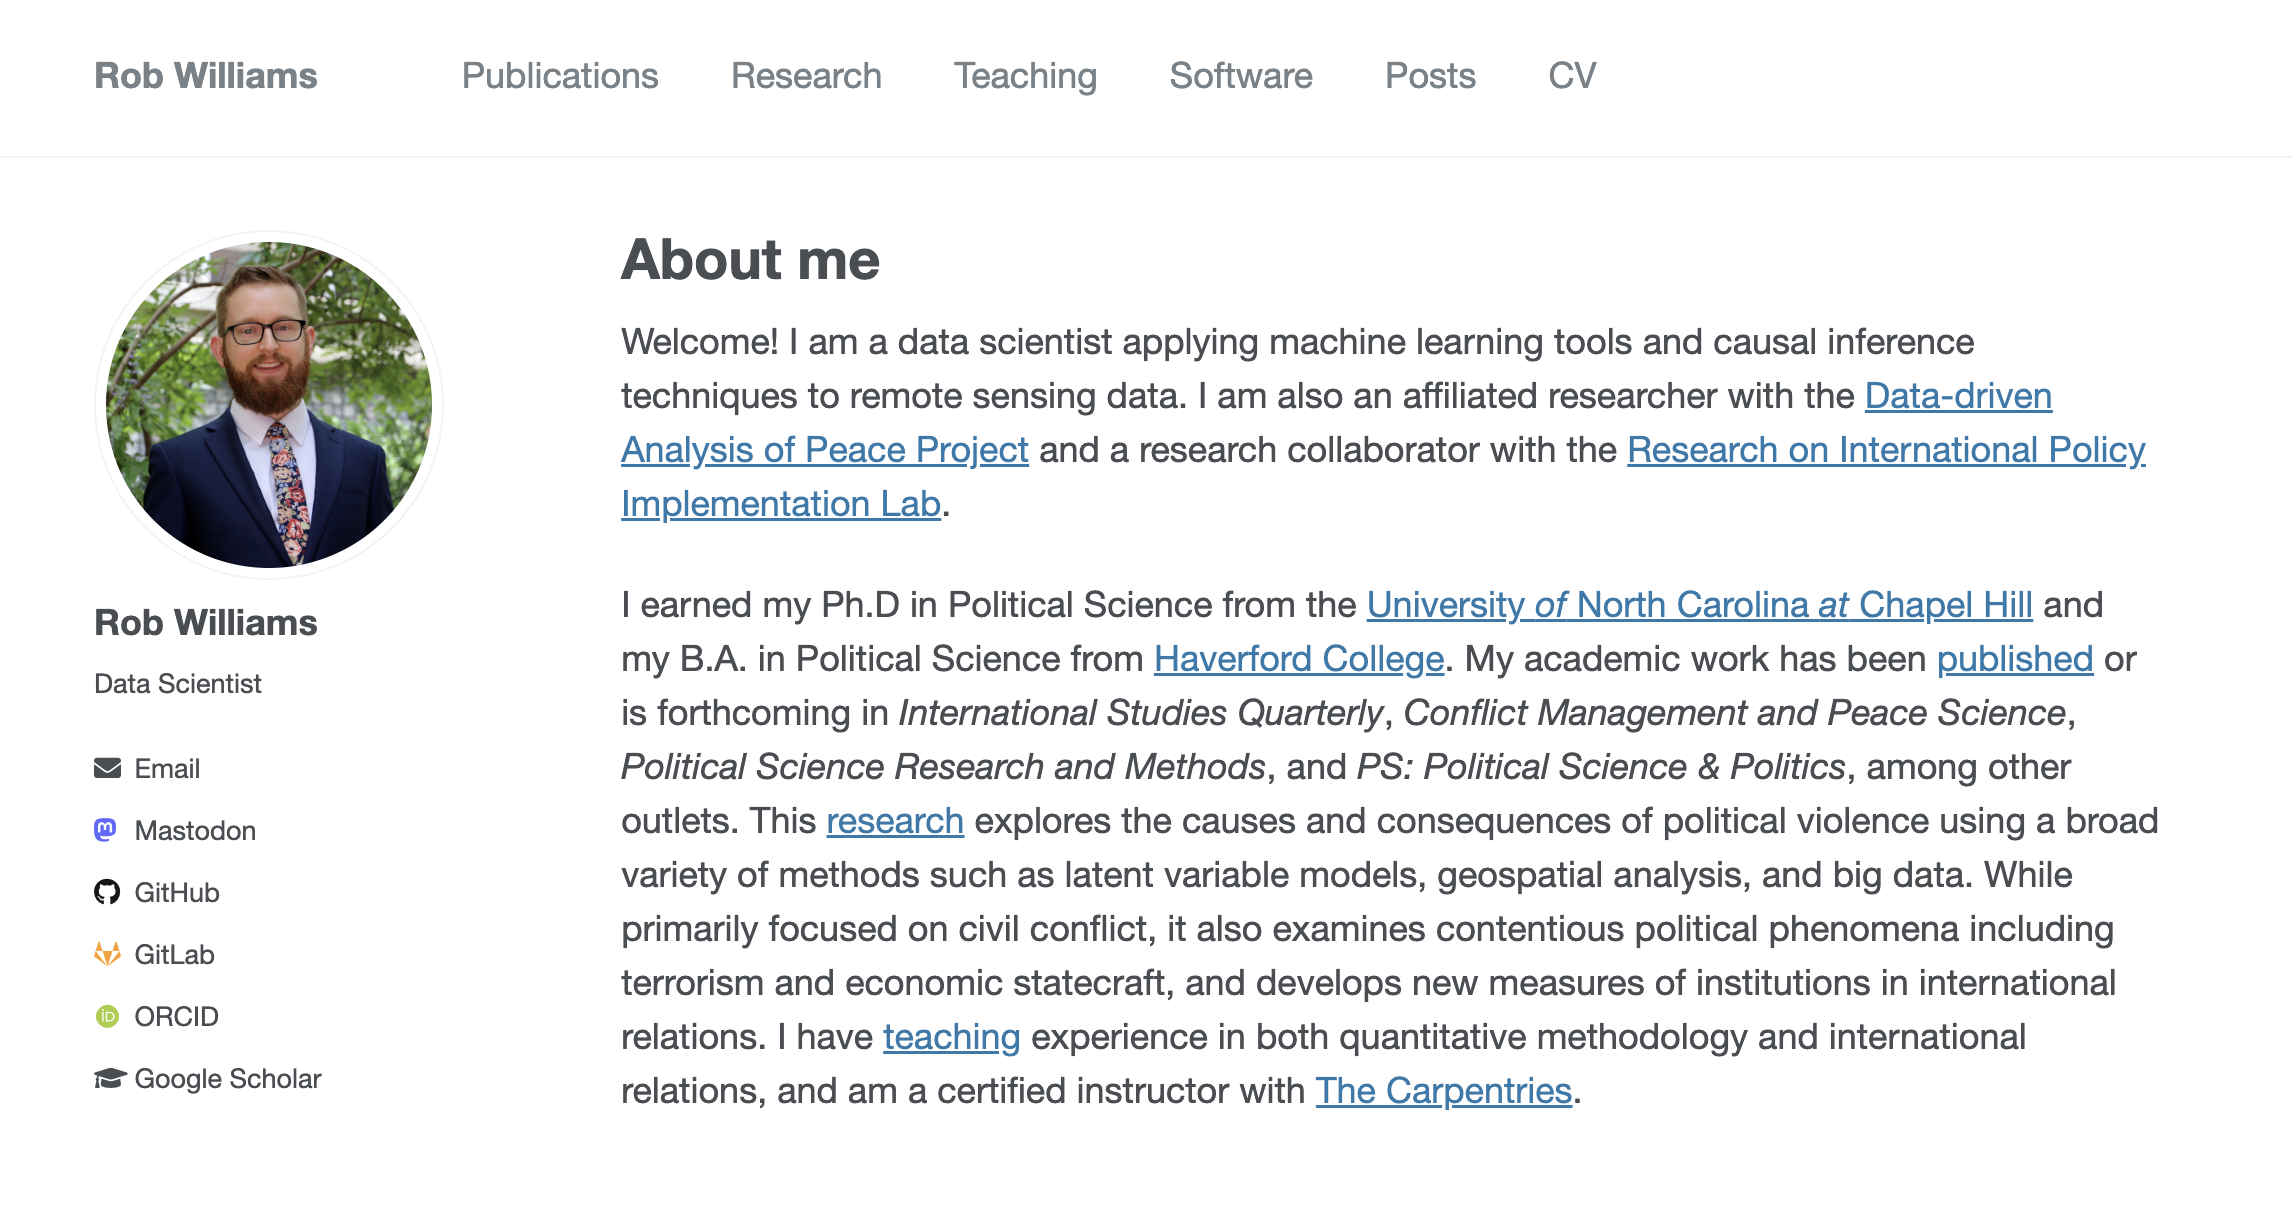
- Building an Academic Website by Rob Williams
- Easiest Way to Create the Perfect Academic Website by Boris Meinhardus. Great video tutorial!
- Personal Website with Minimal Mistakes Jekyll Theme HOWTO by Katerina Bosko. Useful for making little changes later on.
- Customize your personal website by Yutong Jin.
Getting started with GitHub
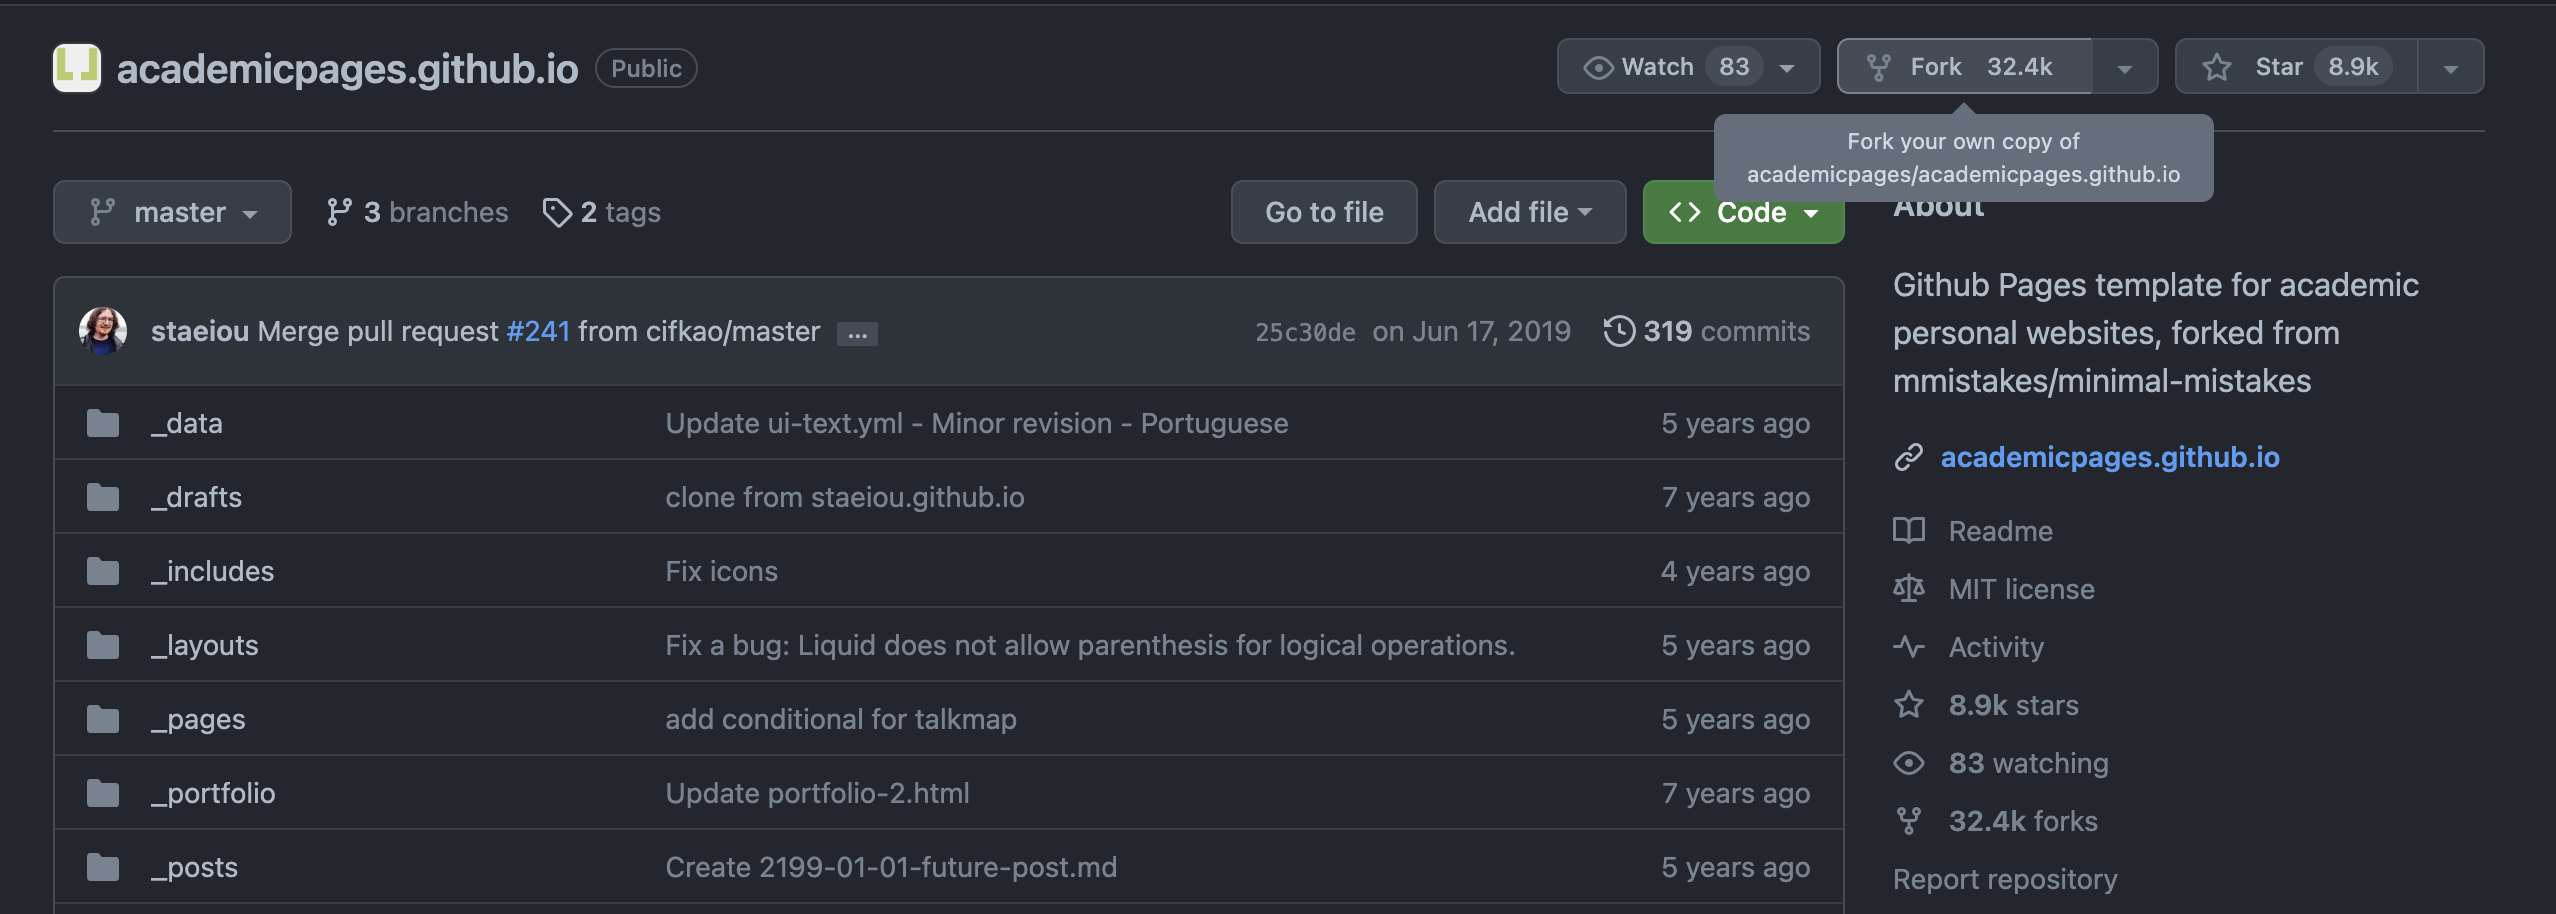
The base structure for the academicpages website is hosted on GitHub which you can get to using the following link. I assume that you will know whtat GitHub is, but if you don’t it’s basically a site where people host code. I would highly recommend making an account, not least because you’ll need one to go any further in this tutorial! There are instructions on what to do on their GitHub page, but you need to fork the repository (clone the files) to your own profile. This means that any changes that you make will be on your own ‘version’ and not the original.
So then you’ll have you own local version of the website to work with. You then need to access this version on your own machine. I did this using GitHub Desktop, which connects to your GitHub account and allows you to open your chosen repository in whatever text editor that you like to use. I use VS Code, so I chose that. When you open the repository, it should look something like this:
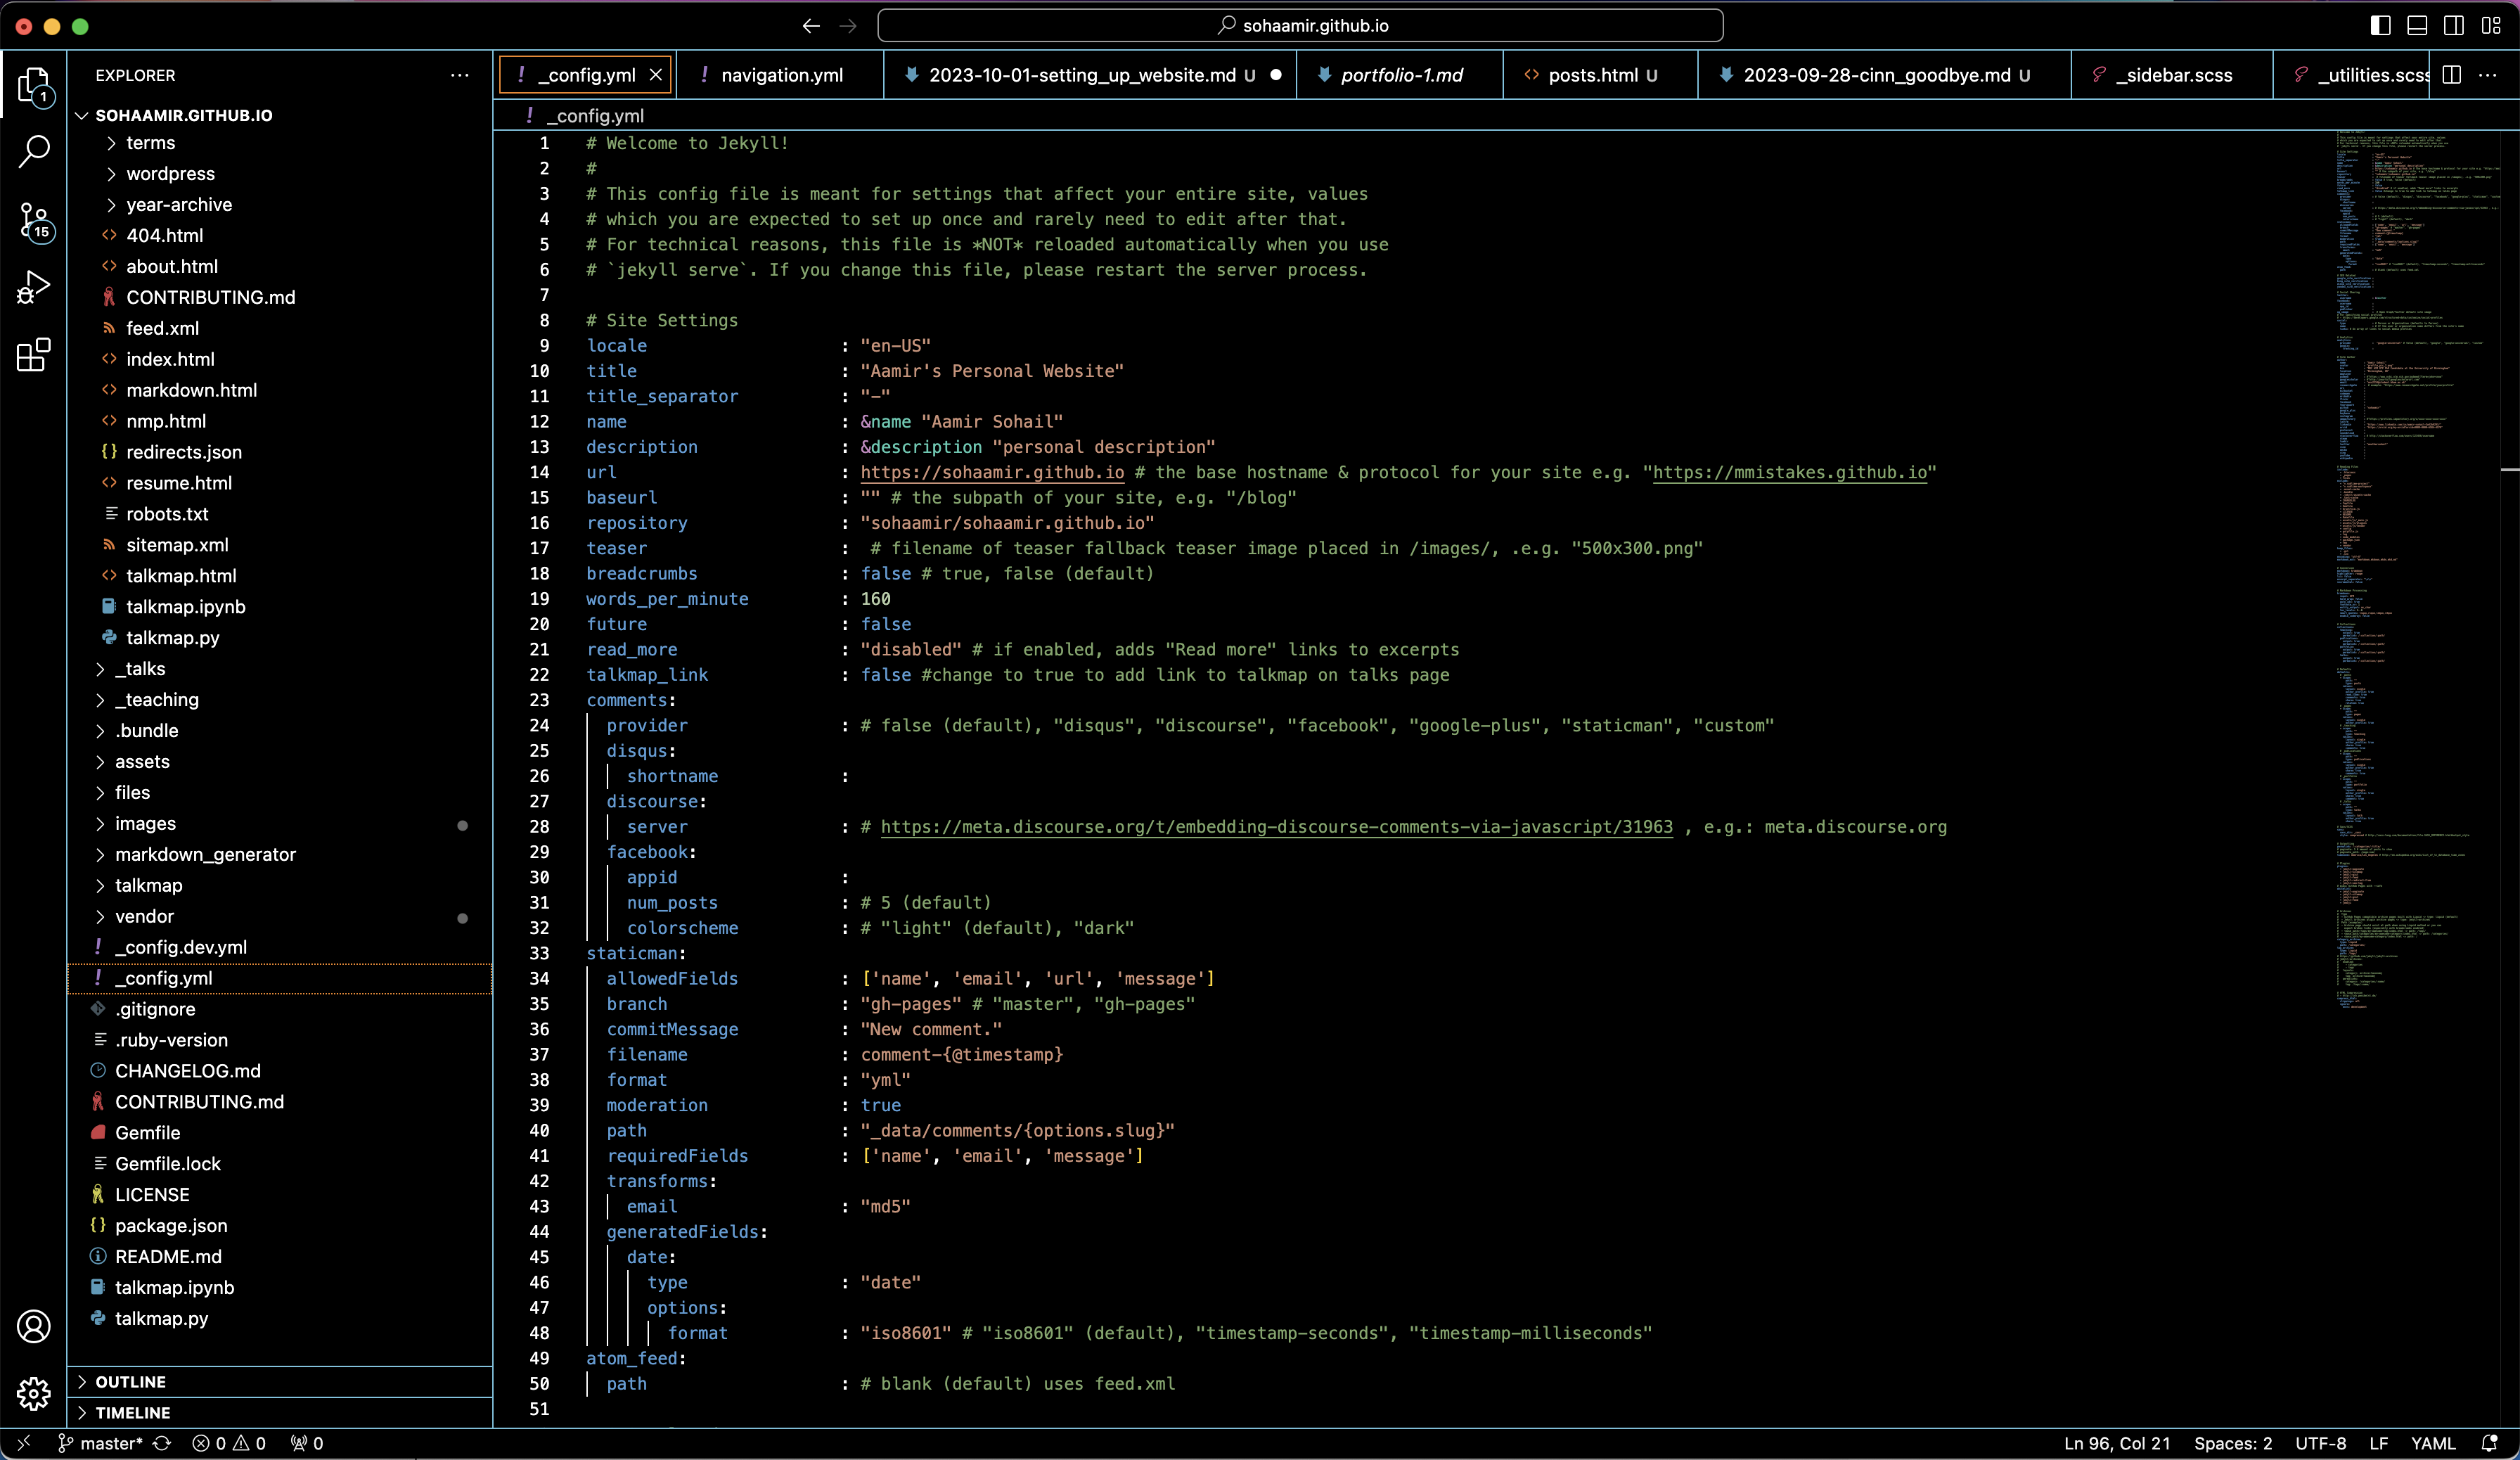
This may look quite scary to start with, but you only need to make a few changes to create a basic website. On the left, you have the repository, and the middle will be whichever file you have open.
Checking changes locally with Bundler
Technically you won’t need this until after you make changes, but it’s typically a good thing to get everything that you need installed and working beforehand. When you make changes to your website, you would like to have a ‘preview’ of what the changes look like, before you ‘commit’ them to your repository. It saves a lot of time and effort rather than commiting the changes each time. To do this, we need something called Bundler. Bundler is a package manager for Ruby, which is the programming language that Jekyll is written in. You can check if you have Ruby installed by running
ruby -v
And if you do not, install ruby using Homebrew by
brew install ruby
This may not happen to you, but when I did this, I got a permissions error:
ERROR:  While executing gem ... (Gem::FilePermissionError)
    You don't have write permissions for the /Library/Ruby/Gems/2.6.0 directory.
Which I fixed by creating a .bundle directory in the root of my website’s repository (e.g., for me ~/Documents/GitHub/sohaamir.github.io/).
mkdir -p .bundle
touch .bundle/config
nano .bundle/config
and then adding the following to the text file (Ctrl + O to save, Ctrl + X to exit):
BUNDLE_PATH: "vendor/bundle"
BUNDLE_BIN: "vendor/bundle/bin"
You can then install bundle…
bundle install
and check it has worked by running:
gem list
So, now all you have to do is to run…
bundle exec jekyll serve
which will give a server address that you can access your website locally.
Configuration file: /Users/aamirsohail/Documents/GitHub/sohaamir.github.io/_config.yml
To use retry middleware with Faraday v2.0+, install `faraday-retry` gem
            Source: /Users/aamirsohail/Documents/GitHub/sohaamir.github.io
       Destination: /Users/aamirsohail/Documents/GitHub/sohaamir.github.io/_site
 Incremental build: disabled. Enable with --incremental
      Generating...
       Jekyll Feed: Generating feed for posts
   GitHub Metadata: No GitHub API authentication could be found. Some fields may be missing or have incorrect data.
                    done in 6.073 seconds.
 Auto-regeneration: enabled for '/Users/aamirsohail/Documents/GitHub/sohaamir.github.io'
    Server address: http://127.0.0.1:4000/
  Server running... press ctrl-c to stop.
Importantly, this will update (after a few seconds) after any changes are saved on your local machine, without you needing to commit these changes to your repository. Wanted to change the size of your profile avatar but aren’t sure if it’s the correct size? Just paste the server address provided into your browser, make the changes, and refresh the page!
Constructing your own website
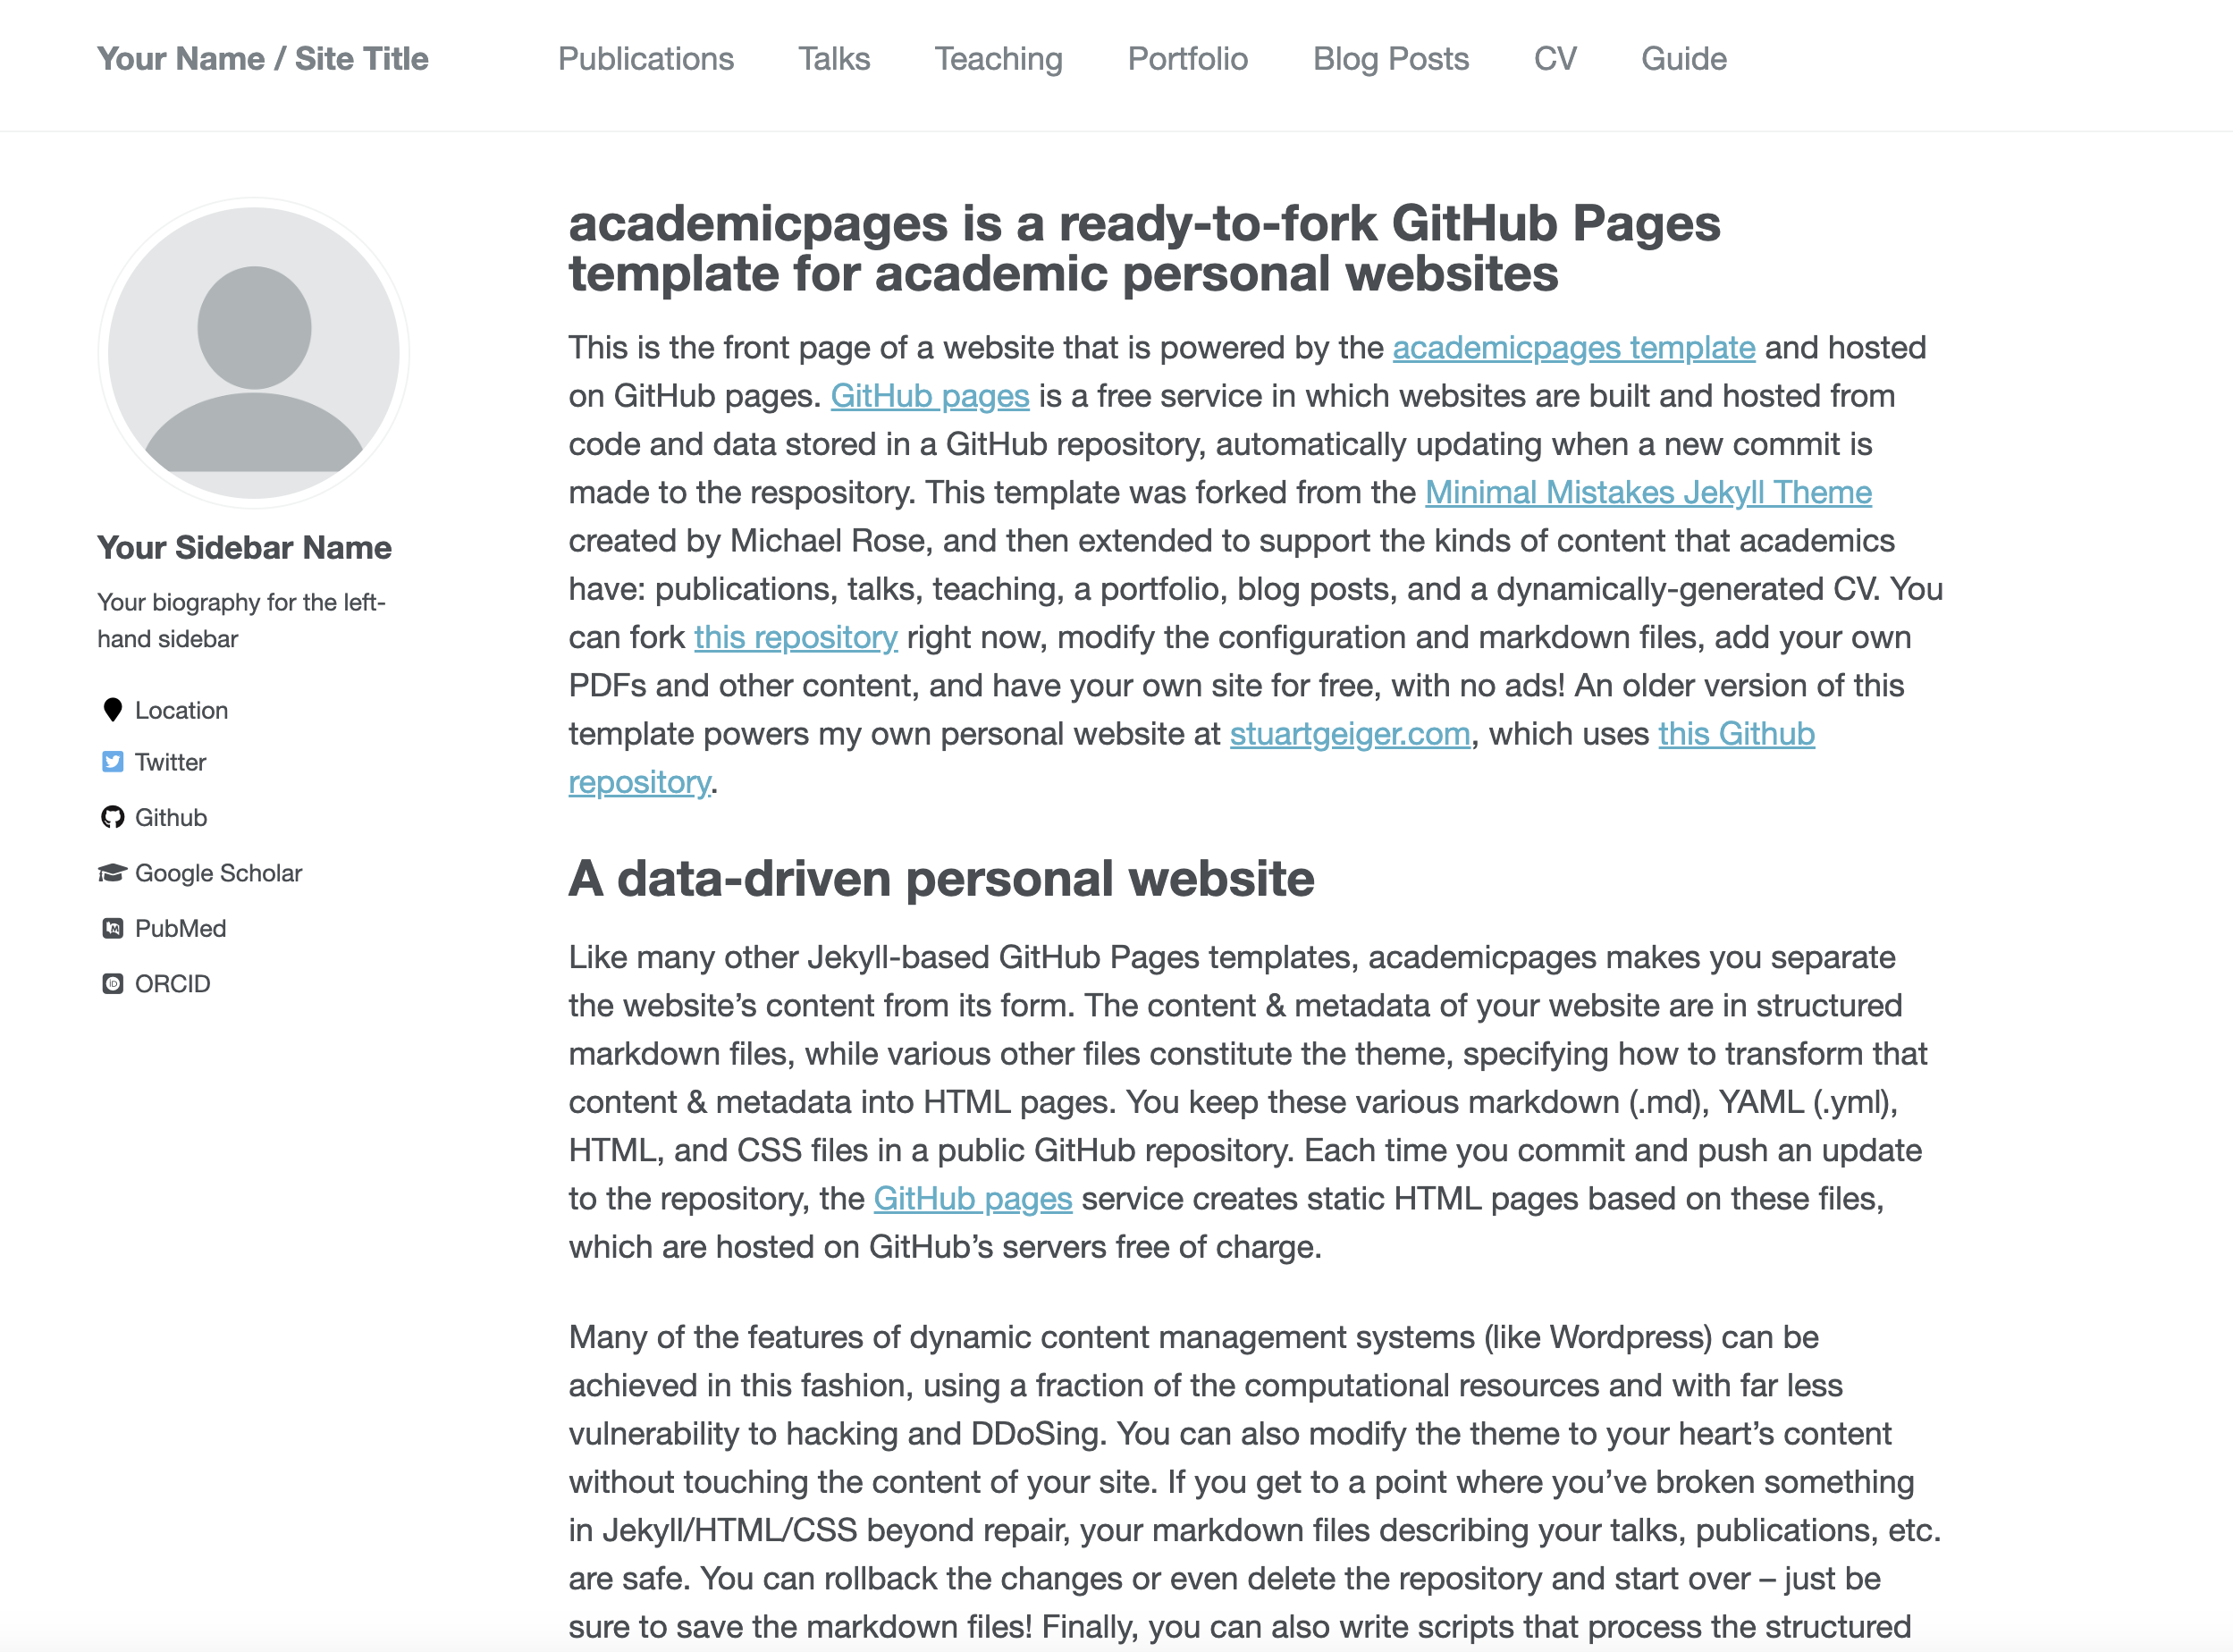
So, if all has gone smoothly 🤞 you should now be able to open up the template page using bundle, which looks something like this:
Now you can actually go about personalizing your website 😊 I won’t cover everything that I have done, simply because most of it is covered by the other guides linked above, but I will go over the basic structure of some of the changes that you can make, with some specific examples that have not been covered by the other guides.
Changing the colour of a toolbar icon
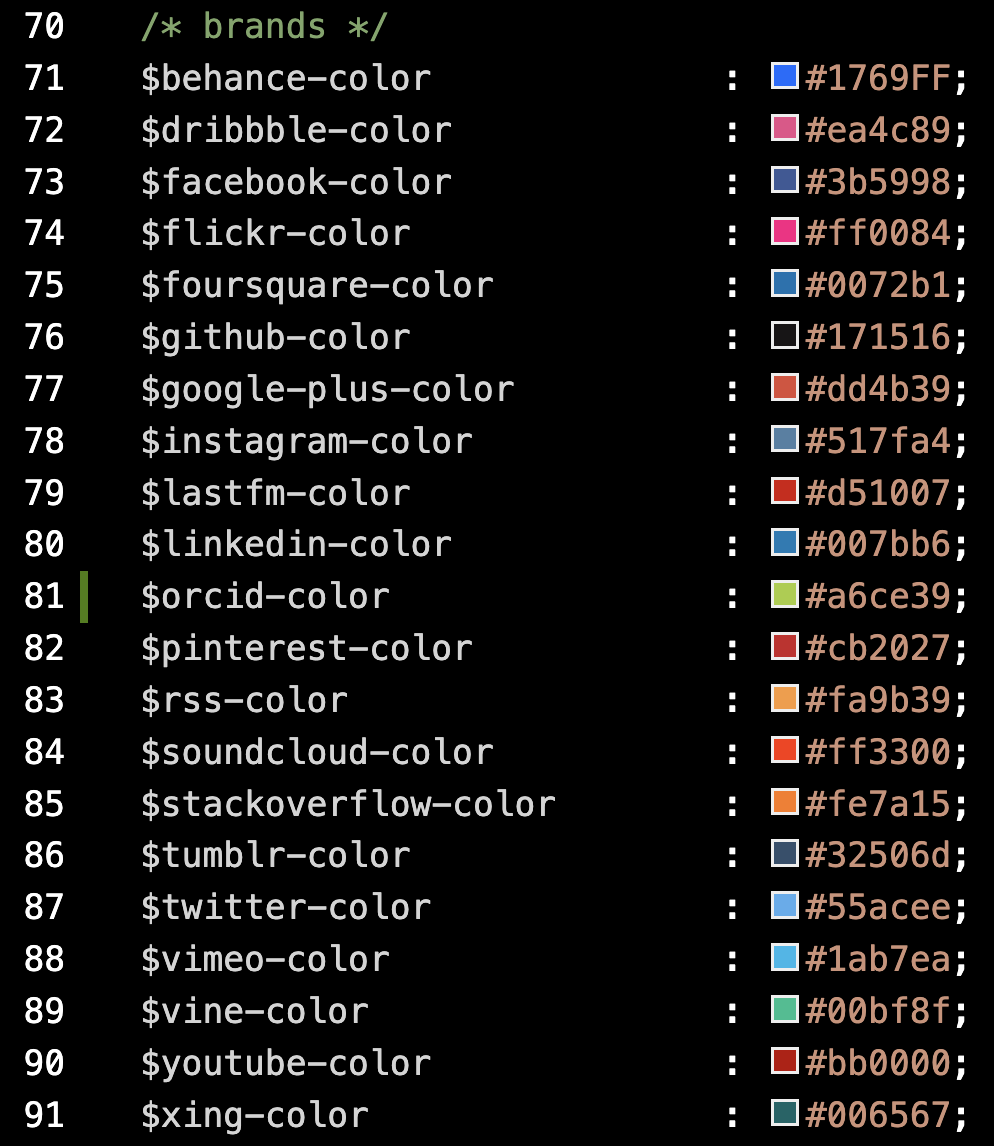
One aspect of the toolbar which I changed was the colour of the ORCID logo, which is black in it’s default setting. I actually wanted to have the official circular logo, but annoyingly I was unable to get it to work, so have settled on having the square logo. To make the colour change, all I had to do was to firstly copy this code into _sass/_utilities.scss directly below the last /* social icons*/ entry.
  .ai-orcid,
  .ai-orcid-square {
    color: $orcid-color;
  }
I then went into _sass/_variables.scss and added an orcid brand with the respective colour.
Adding a gif
The first thing which grabs people’s attention is the GIF of a brain (actually a GIF of my own White-matter nulled MPRAGE T1). To add a GIF, simply using the following code:
<div style="float: right; margin-left: 10px;">
  <img src="/path/to/your/gif/here" alt="Brain GIF" width="x" height="y">
</div>
And voila, you have your very own GIF!

Adding a Google Map
You may want to add a Google Map to demonstrate your current working address. To do so:
- Firstly find your location on Google maps,
- Click the ‘share’ button across from the ‘Directions’ button
- Select the ‘Embed a map’ tab and copy the HTML code
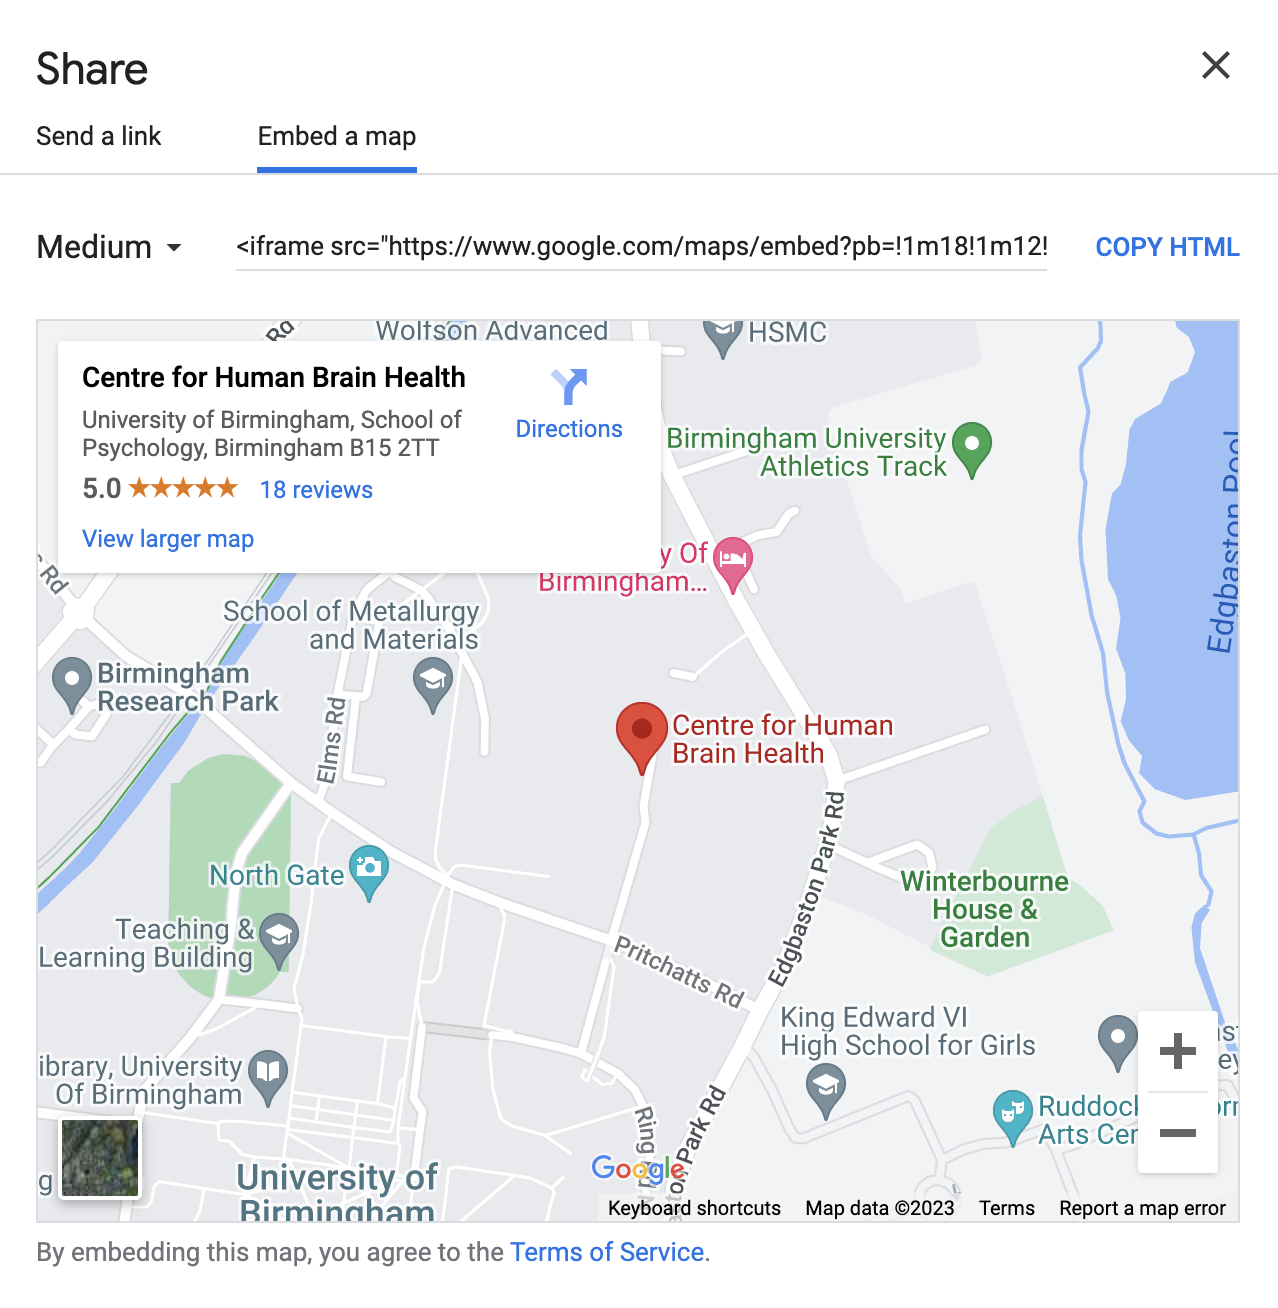
- Finally, just add the HTML code into the template:
<iframe
  src="https://www.google.com/maps/embed?pb=!1m14!1m8!1m3!1d9725.651522662583!2d-1.9272804!3d52.4535496!3m2!1i1024!2i768!4f13.1!3m3!1m2!1s0x4870bde470f7c04d%3A0x583b0469e1755681!2sCentre%20for%20Human%20Brain%20Health!5e0!3m2!1sen!2suk!4v1695917516555!5m2!1sen!2suk" width="850" height="450" style="border:0;" allowfullscreen="" loading="lazy" referrerpolicy="no-referrer-when-downgrade"></iframe>
<br>
Adding your CV
In the tabs section at the top of your website, there is one for your ‘CV’. The default version I believe is to have your CV formatted into the website as any other post. However, we often put a lot of effort into our CV’s and would prefer to have the electronic version available. Thanksfully, this is easy to do.
Firstly, if you go to _data/navigation.yml you can see all of the tabs that are defaulted in the website. To add your own CV and to have it open when opening the ‘CV’ tab, you need to firstly upload your CV to the files subfolder. You then need to modify the navigation.yml file to tell it that you want to open up your CV. You can do this by writing the following for that section:
  - title: "CV"
    url: /files/your_example.cv.pdf
Importantly, this file can be used to change (or remove various tabs which aren’t relevant). For example, I decided to rename ‘Portfolio’ to ‘Research’ and to comment out some tabs which aren’t relevant.
main:
  - title: "Research"
    url: /portfolio/

 # - title: "Publications"
 #   url: /publications/

  - title: "Blog Posts"
    url: /year-archive/

  - title: "CV"
    url: /files/academic_cv.pdf

 # - title: "Talks"
 #   url: /talks/

 # - title: "Teaching"
 #   url: /teaching/

 # - title: "Guide"
 #   url: /markdown/
Changing your favicon
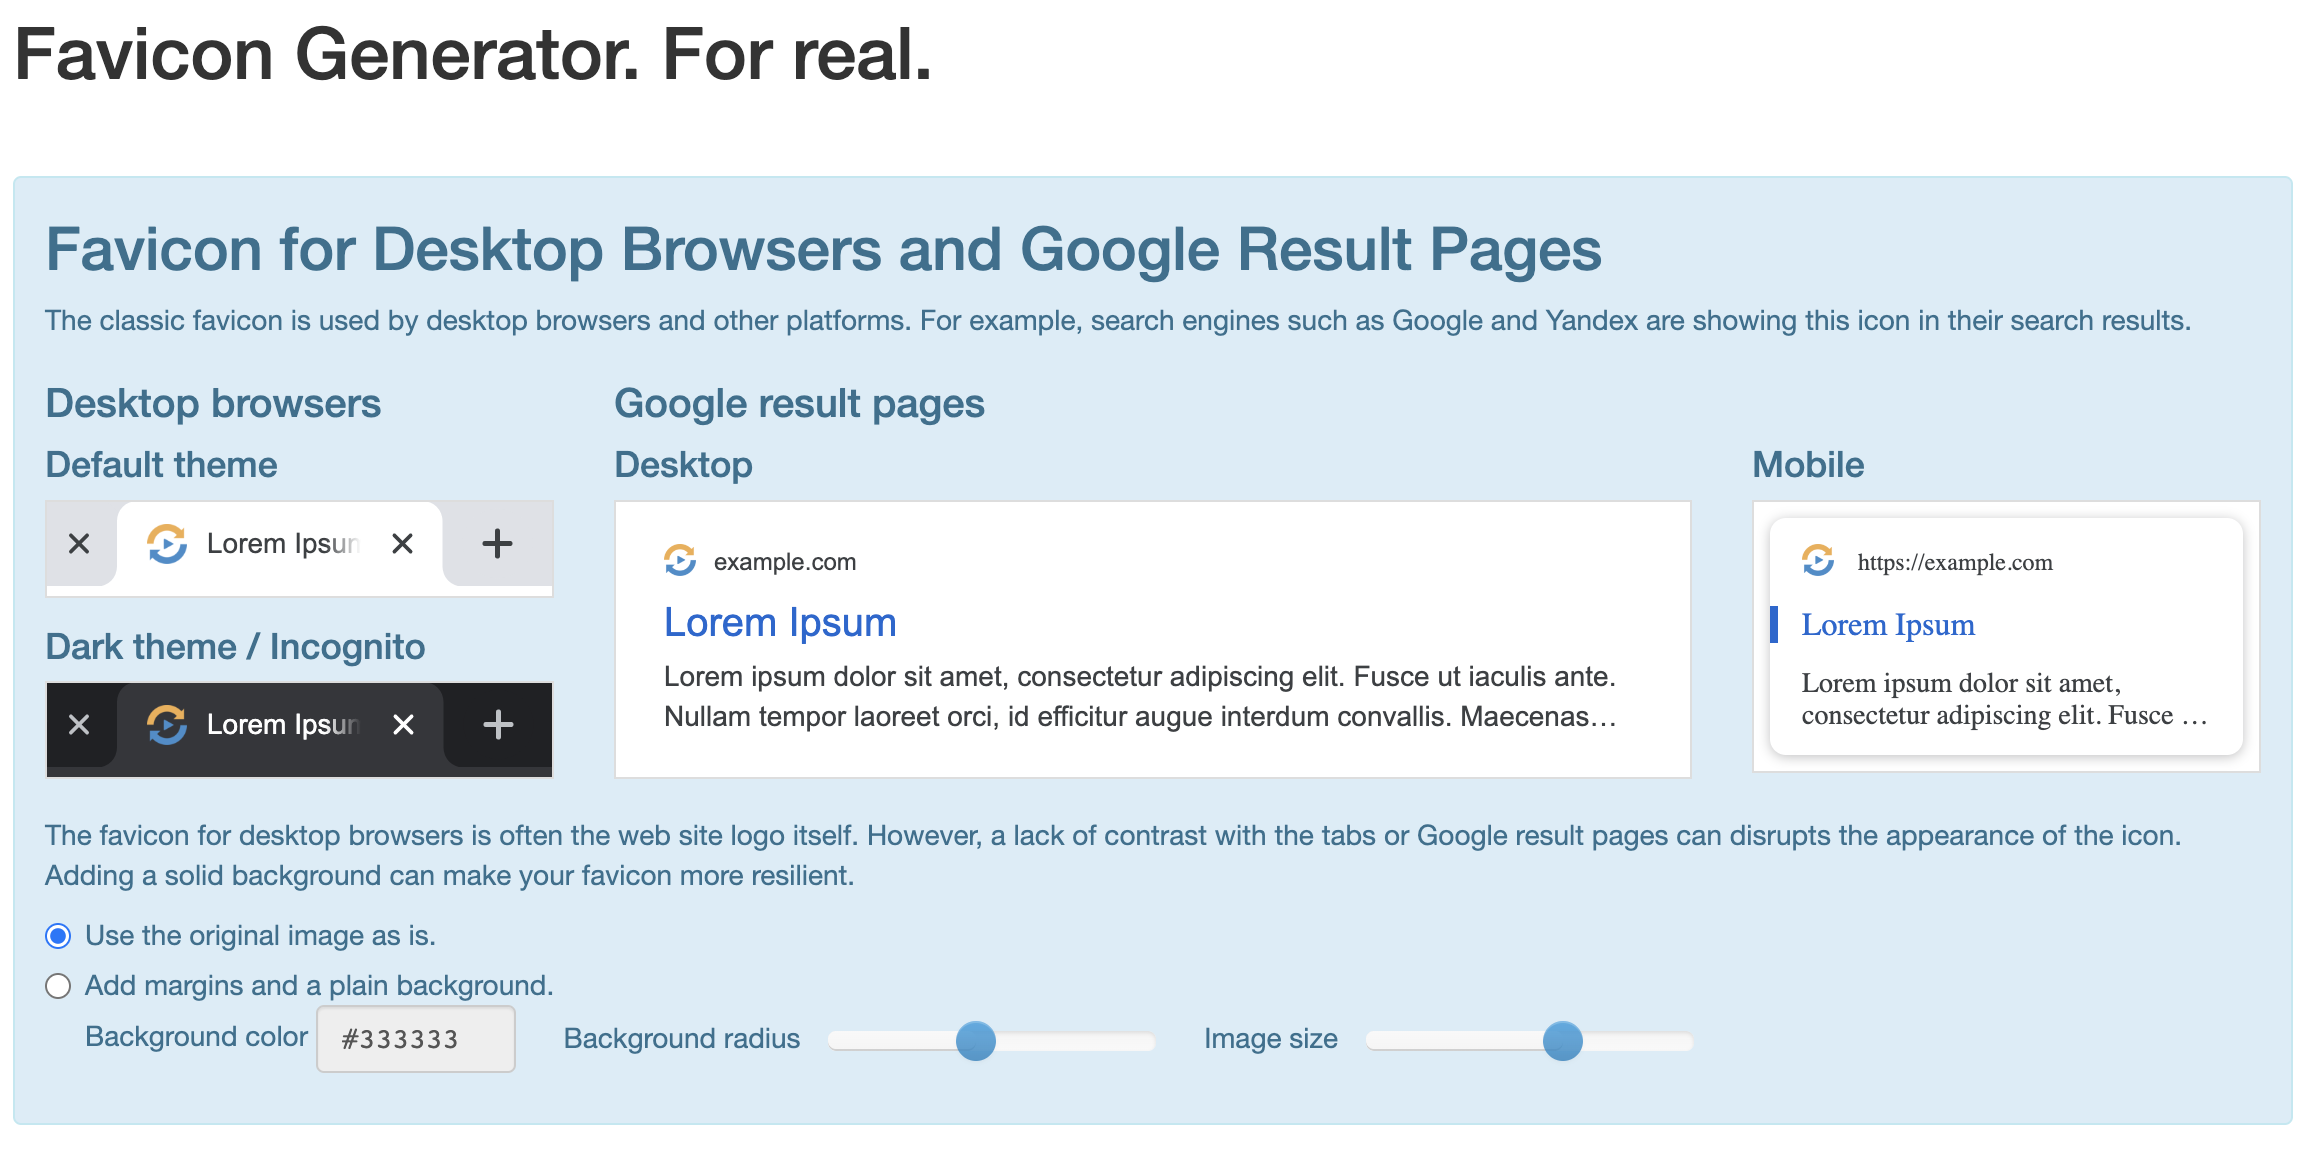
What on earth is a favicon? Isn’t that some type of Pokemon? Well, have you ever noticed in your browser, that there is often a little icon in the tab for each website? Well, that is called a favicon. It probably won’t be recognised by the visitors to your website, but I think changing the favicon to something more personalized is a nice touch. Here is how you can do it.
Firstly, you need to find an image (preferably with no background). You then need to use a favicon generator (I used realfavicongenerator.net). It demos what your favicon will look like on your website which can be handy, not least because if there is a background, it will show up.
Scrolling down to the bottom of that page, you can then generate your favicon package. You can then extract it to folder called favicon in the /assets/img folder of your repository. Then open up _includes/head/custom.htmland copy the following code:
<!-- start custom head snippets -->

<link rel="apple-touch-icon" sizes="180x180" href="/assets/img/favicon/apple-touch-icon.png?v=M44lzPylqQ">
<link rel="icon" type="image/png" sizes="32x32" href="/assets/img/favicon/favicon-32x32.png?v=M44lzPylqQ">
<link rel="icon" type="image/png" sizes="16x16" href="/assets/img/favicon/favicon-16x16.png?v=M44lzPylqQ">
<link rel="manifest" href="/assets/img/favicon/site.webmanifest?v=M44lzPylqQ">
<link rel="mask-icon" href="/assets/img/favicon/safari-pinned-tab.svg?v=M44lzPylqQ" color="#5bbad5">
<meta name="msapplication-TileColor" content="#da532c">
<meta name="theme-color" content="#ffffff">

<link rel="stylesheet" href="/assets/css/academicons.css"/>

...
<!-- end custom head snippets -->
And that’s it! You should have a new favicon, the image that you selected earlier. Was it worth it? Probably.
Contact Forms
The final guide that I will cover is adding a contact form which people can actually use to contact an email address. To do this, you need a server to process the HTML forms for us. I ended up using Formspree but there are others available. Through Formspree, once you create an account and a form, it will generate some HTML code for you to paste in your website. For me, the code looked like this:
<!-- modify this form HTML and place wherever you want your form -->
<form
  action="https://formspree.io/f/xpzgowwz"
  method="POST"
>
  <label>
    Your email:
    <input type="email" name="email">
  </label>
  <label>
    Your message:
    <textarea name="message"></textarea>
  </label>
  <!-- your other form fields go here -->
  <button type="submit">Send</button>
</form>
Whilst the action URL will be different, everything else should be the same. All you have to do now is to copy this code into whichever page you want the form to be presented and that’s it! The only additional change I made was to add a third box where the person’s name can be recorded. So, my form looks like this:
<form
  action="https://formspree.io/f/xpzgowwz"
  method="POST"
>
  <label>
    Your name:
    <input type="text" name="name">
  </label>
  <label>
    Your email:
    <input type="email" name="email">
  </label>
  <label>
    Your message:
    <textarea name="message"></textarea>
  </label>
  <button type="submit">Send message</button>
</form>
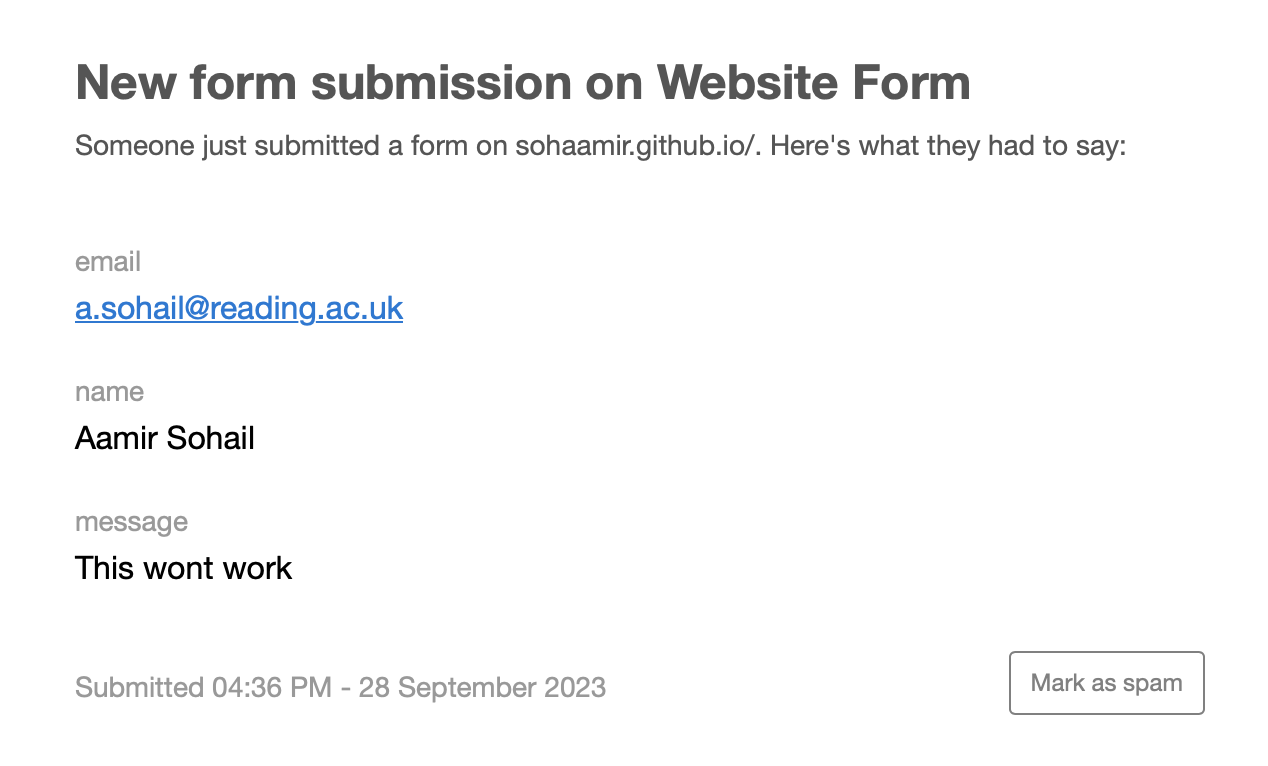
Subsequently, whenever someone fills out my form, I get an email with the following:
Other useful tips already covered in other guides
There are a few more changes that I made, but using guides that already exist. I would highly recommend checking them out if you would like to do the same. These are listed above, but one specific aspect that I would highlight is with changing profile avatar and the size of your name. If you want to change the size/shape of your profile avatar and the size of your name immediately below, see Personal Website with Minimal Mistakes Jekyll Theme HOWTO by Katerina Bosko. There are also many other useful customizations covered on her page.
Committing your changes with git
Ok, so you’ve been hard at work making all of these customizations, you’ve checked through bundle that you are happy with these changes, and would now like to make them ‘official’ so-to-speak. This is very simple to do using Git. Again, the fact that you have been using GitHub should mean that Git is no stranger, but just for convienience, Git is the fundamental tool for version control, which GitHub uses to provide remote hosting for Git repositories. So, because you have made the changes on your local machine, you can use Git to ‘commit’ these changes to the repository hosted on GitHub. You just need to run the following commands from your website’s root:
git status
git add .
git commit -m 'describe changes made here'
git push origin
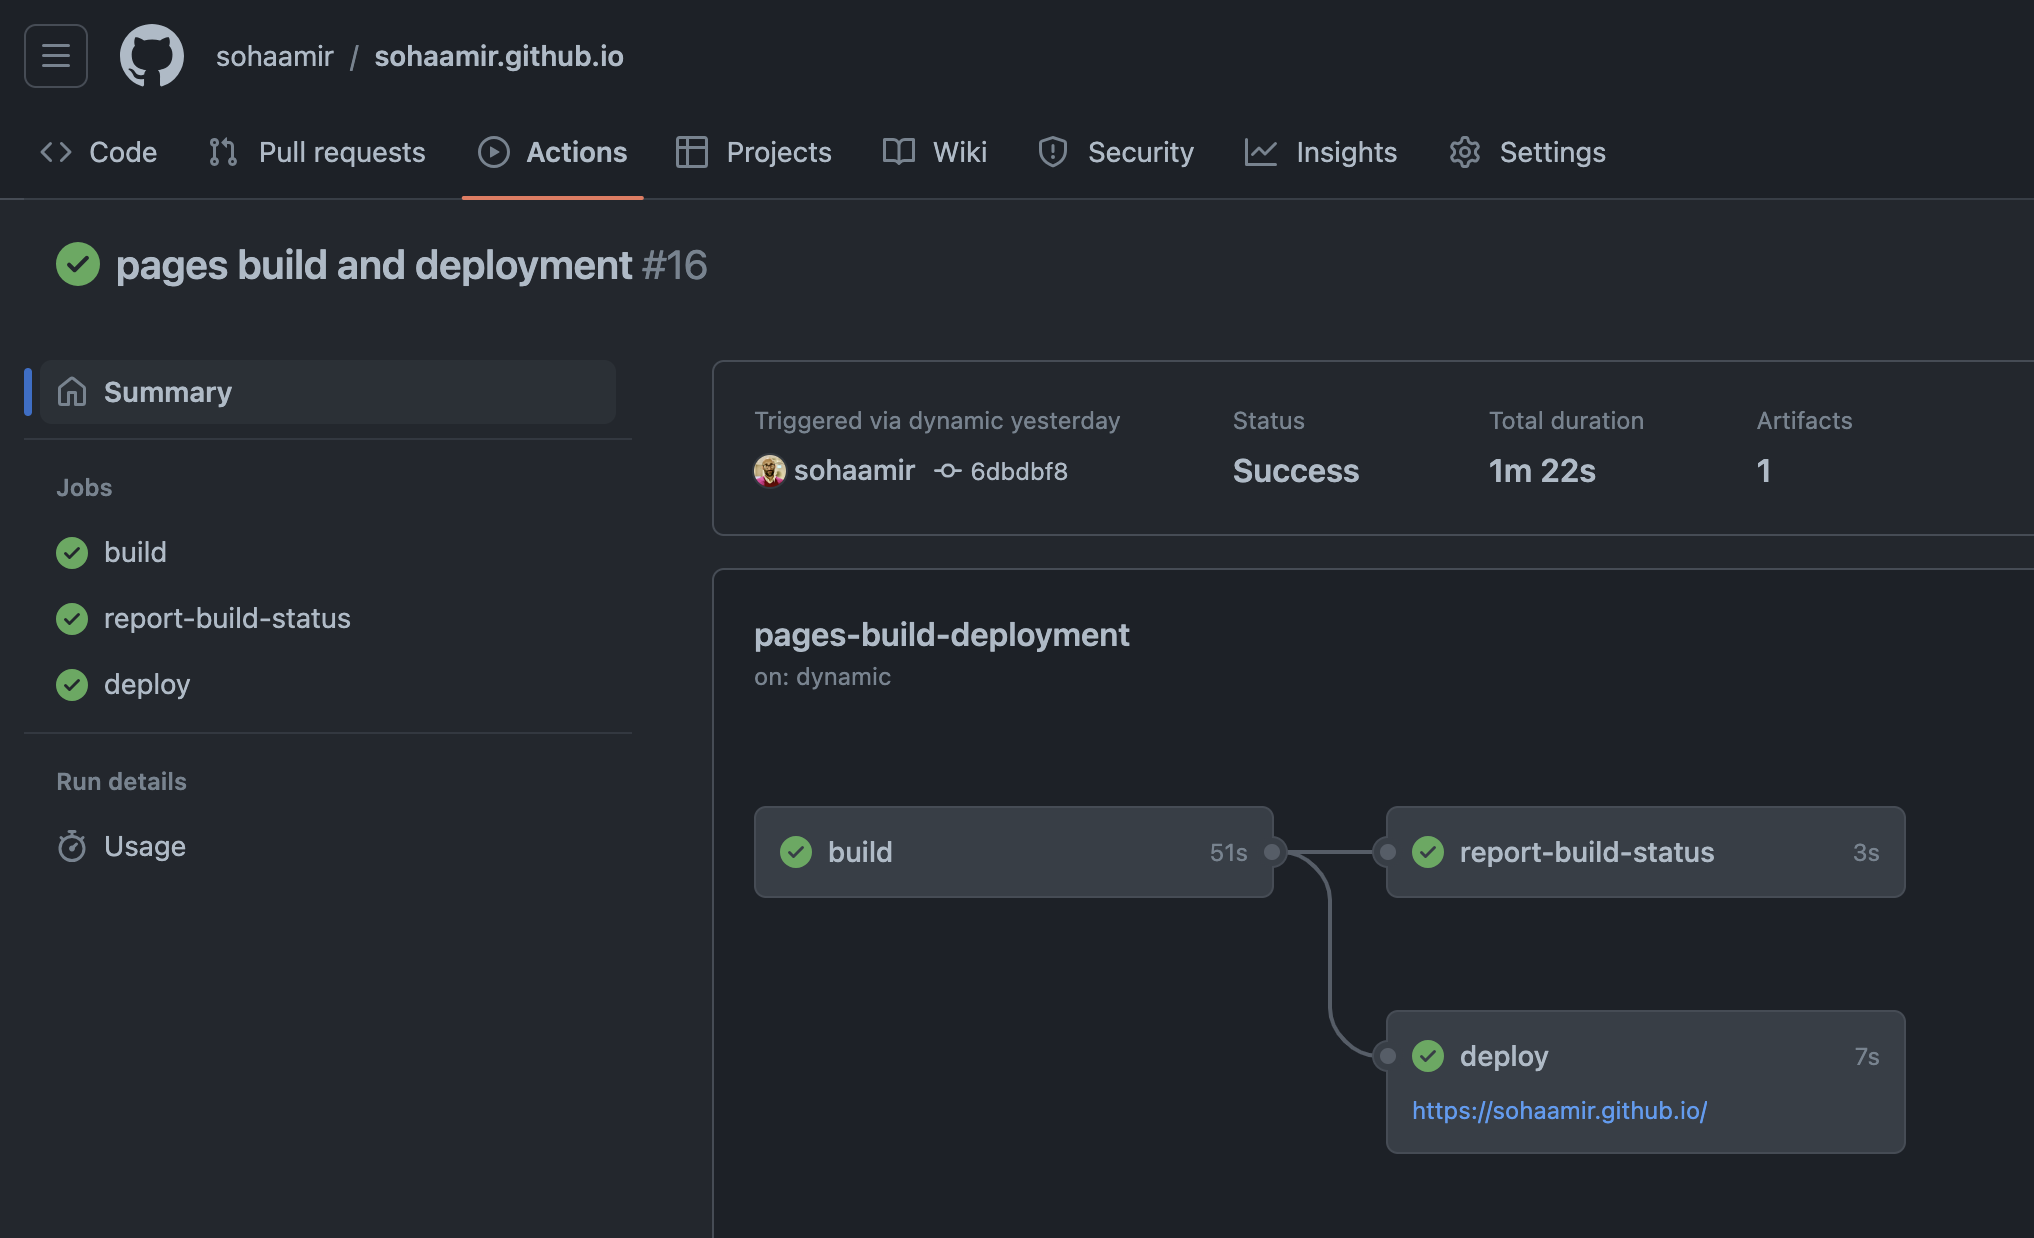
And that’s it! Your GitHub repository should then update with your local changes (it may take a minute). You can then see the latest version of your website by selecting your repository on your GitHub page, choosing the ‘Actions’ tab, clicking on the most recent deployment and clicking your github.io link.
N.B If you are wondering why this guide is for the academicpages theme when I am currently using the al-folio theme, then yes I ended up changing my mind after initially making my website in the former 🤦
Image credits:
Bruce Almighty GIF: Tom Shadyac, et al. © BRUCE ALMIGHTY. USA, 2003. GIF provided by Tenor
Screenshots: Michael Schlottke-Lakemper, Rob Williams, Academic Pages © 2016 Michael Rose and released under the MIT License.