Making your course open-source
University courses are often hosted on a platform such as Moodle, Blackboard or Canvas, which restrict access to currently enrolled students. Whilst there is nothing inherently wrong with this approach per se, there are several limitations:
- Course materials are not openly available, to the detriment of externals and students on the course in following years
- The design and strcture of the teaching materials is not ideal for certain courses (e.g., neuroimaging)
- Updating the materials (e.g., for a new academic year) is laborious and inefficient
Subsequently, many teachers within the field of statistics, psychology and cognitive science now host their course materials on a dedicated webpage. Whilst there are many different approaches, a common one is to place the materials on a GitHub repository, and host the website using GitHub Pages. This has many benefits over the traditional method of hosting course materials:
- Version Control - As changes are tracked using
git, contributors can track all changes to materials, easily rollback if needed, and maintain a clear history of updates, making course maintenance straightforward - Collaboration - Similarly,
gitand GitHub allows for multiple instructors to contribute, and students can suggest fixes through pull requests - Accessibility - Materials are freely available online 24/7, with no institutional login needed
- Cost-effective - Hosting on GitHub Pages is free
- Open Education - Promotes sharing of resources, allows educators to build upon existing materials, and contributes to open education initiatives
So, doing so I think is a no-brainer. Some may think that hosting your own course on GitHub can be daunting, but it’s actually very simple.
Before anything else, your first step is to decide a basic structure and theme. There are many options to choose from, but some of the most popular include JupyterBook and Read the Docs. Some examples of each are listed below:
- Andy’s Brain Book
- NI-edu
- U of A: Neuroimaging Core Documentation
- Data analysis for Neuroimaging (DAFNI)
- Psych 214 – functional MRI methods
- Computational Models of Human Social Behavior and Neuroscience
- Dartbrains
This tutorial will specifically cover how to set-up your website using MkDocs. I like MkDocs because it’s very easy to set-up and make changes, and it supports many themes. You can also preview your changes in real time which is very useful!
FYI, for this tutorial I will assume that you are working on a Mac…
Setting up the website folder and GitHub repository
Firstly, we should create and set up our website’s folder locally, install the relevant requirements and connect it to the corresponding GitHub repository.
Open up a terminal, and then create and move into the website folder:
mkdir my-mkdocs-site
cd my-mkdocs-site
Then create a virtual environment for the folder:
python -m venv venv
source venv/bin/activate
install the required packages (just the necessary ones to start):
pip install mkdocs
pip install mkdocs-material  # Popular theme, optional but recommended
pip freeze > requirements.txt  # Save dependencies in requirements.txt
create a .gitignore:
touch .gitignore && echo -e "venv/\nsite/\n__pycache__/\n.DS_Store" > .gitignore
and initialize the MkDocs project:
mkdocs new .
Now let’s create the corresponding repository on GitHub:
- Go to your profile on GitHub and create a new repository with the same name (e.g., my-mkdocs-site)
- But don’t add anything else e.g., initializing it with a README.md (since you’ll eventually create one locally)
Now let’s connect the two. Back in your terminal type:
git init
git add .
git commit -m "Initial commit"
git branch -M main
git remote add origin https://github.com/yourusername/your-repo-name.git
git push -u origin main
So now our local folder for our website is connected to the GitHub repository.
You can check this by typing:
git remote -v
which will list the GitHub repository(s) connected:
❯ git remote -v
origin	https://github.com/sohaamir/my-mkdocs-site.git (fetch)
origin	https://github.com/sohaamir/my-mkdocs-site.git (push)
We can now start making some changes to the website’s content. Open up your code editor of choice. I personally use VS Code, and if you are too, you can open the folder in VS Code directly from the terminal by typing:
code .
In your editor of choice, open up the mkdocs.yml file. It should just have a single line of code:
site_name: My Docs
Let’s create a basic structure for our website. Replace that with:
site_name: Your Site Name
theme:
  name: material  # if you installed mkdocs-material
nav:
  - Home: index.md
You can now see your website by running:
mkdocs serve
If you are already running a website on a localhost (for example when creating this tutorial I also had my personal website running) you will have to specify the port:
mkdocs serve -a localhost:XXXX
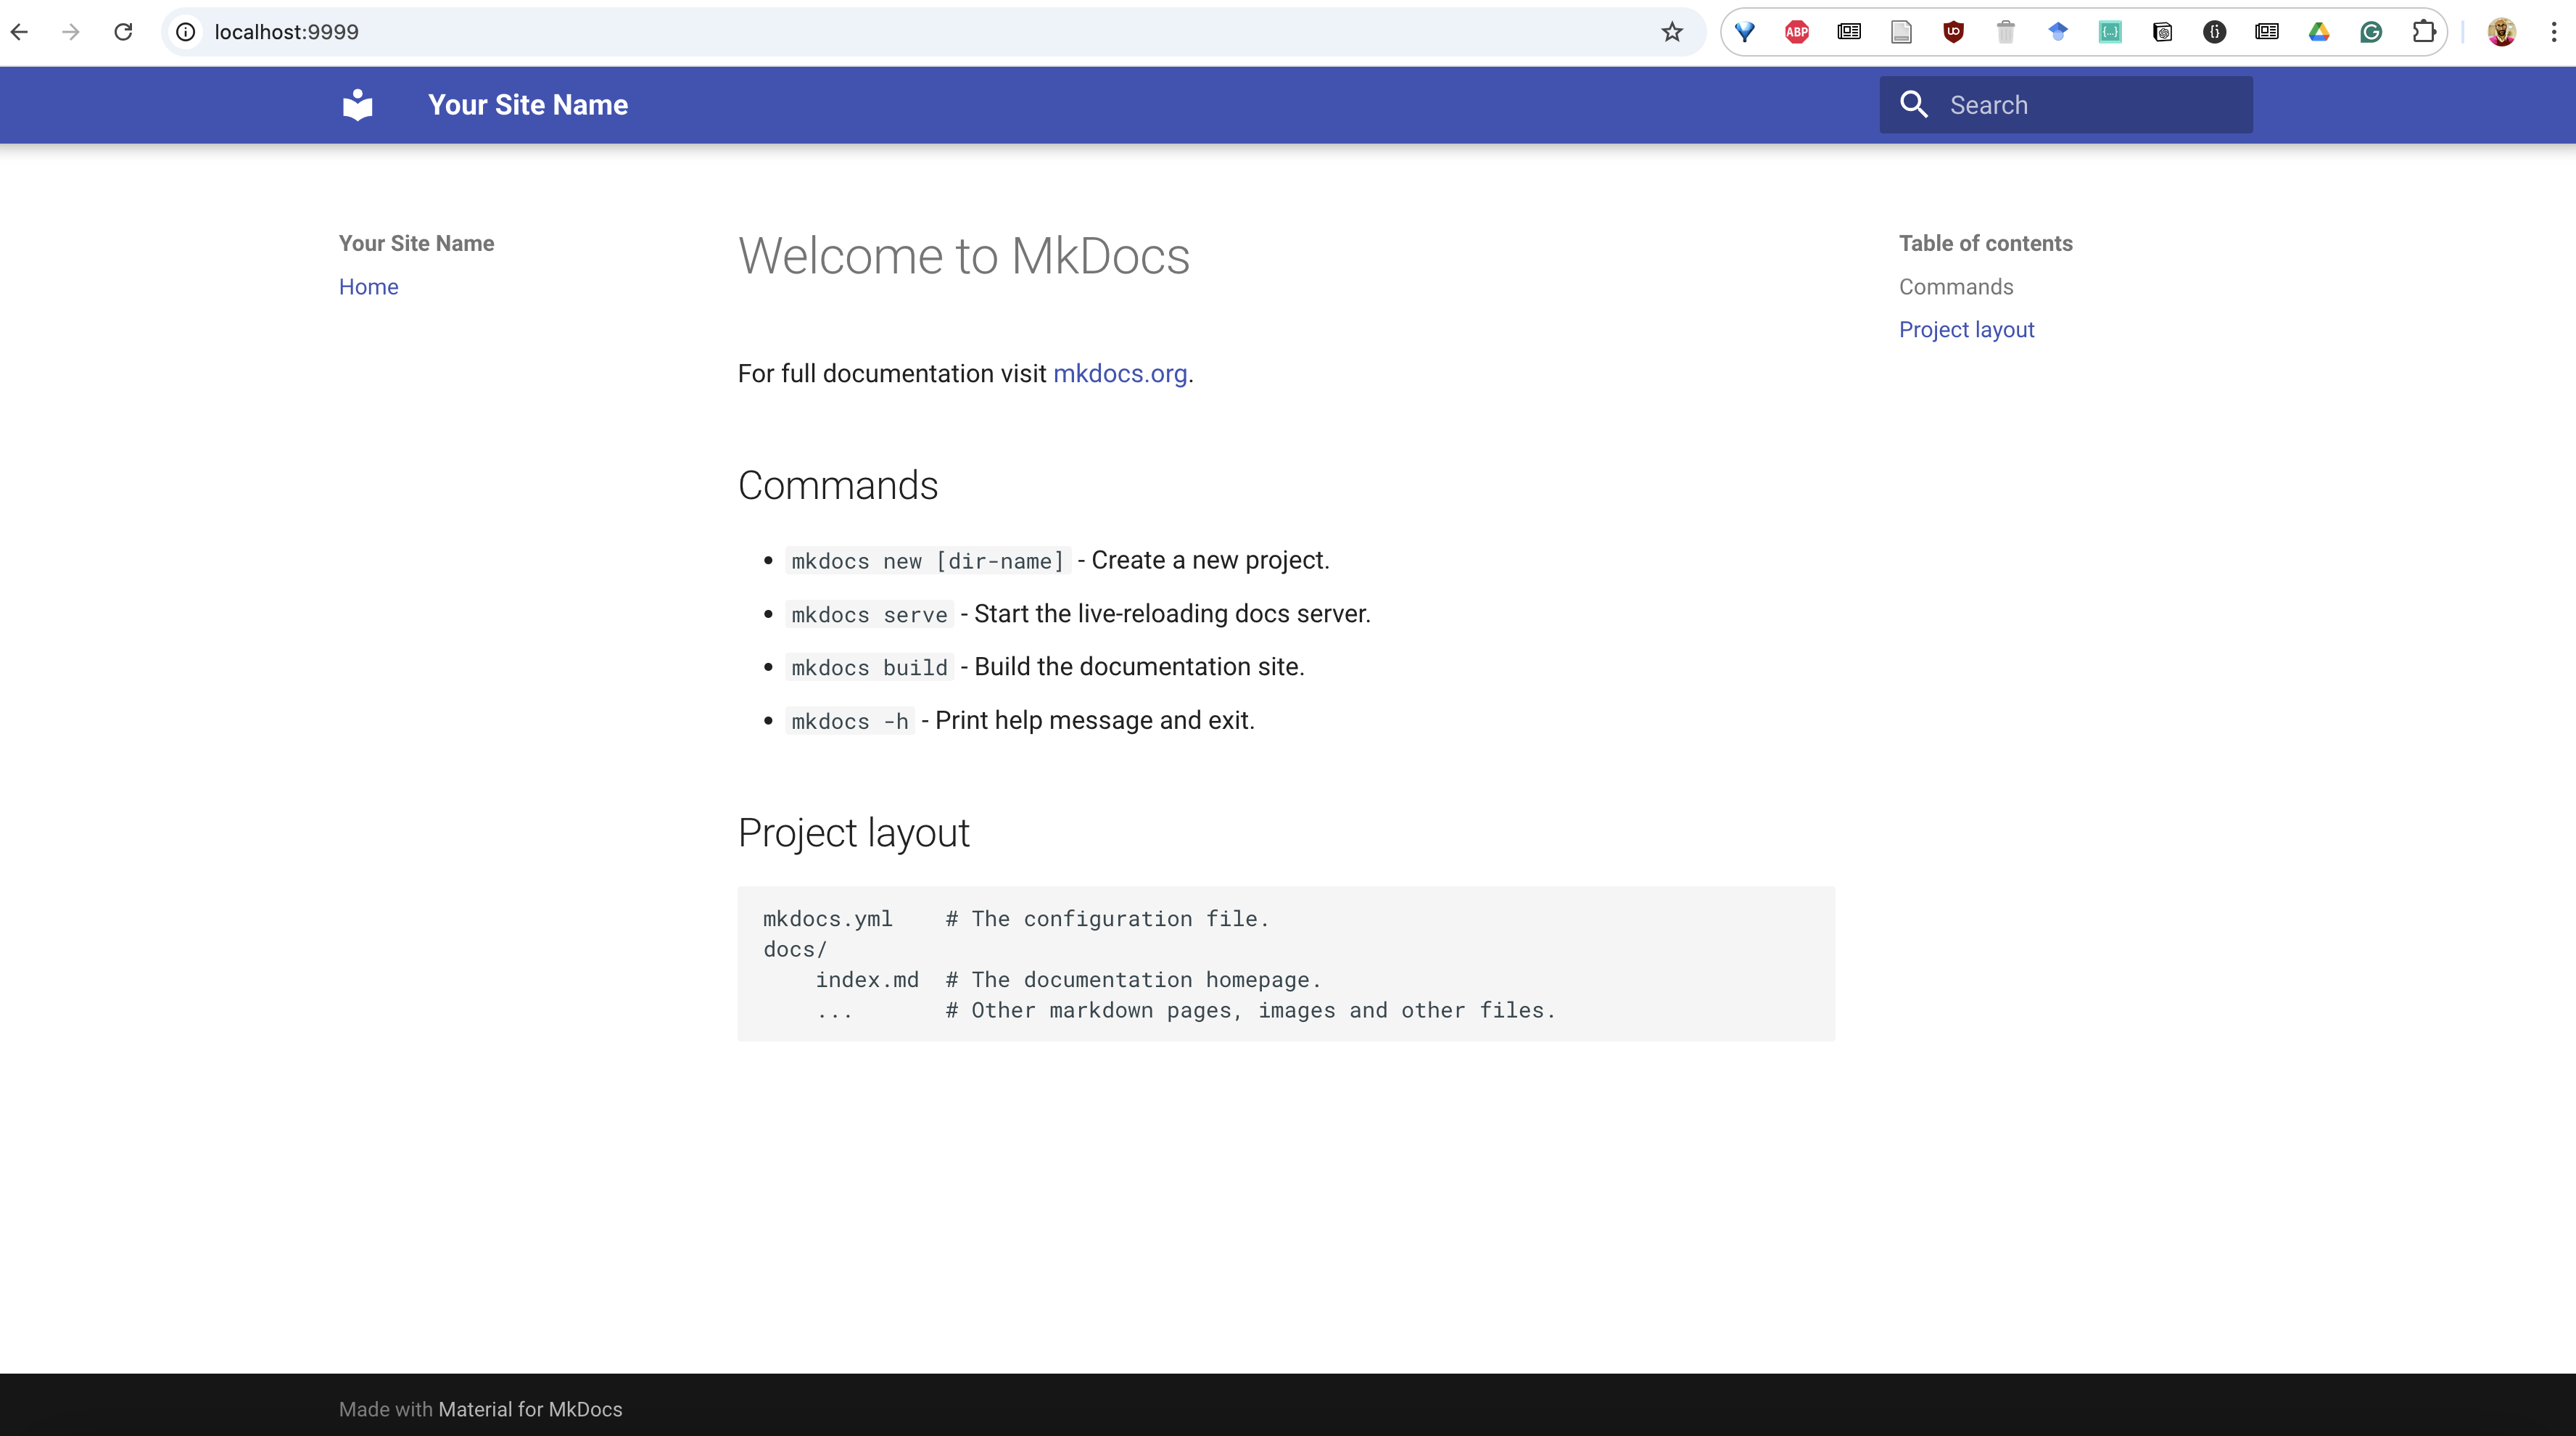
In any case, your website should look something like this:

Hosting your site on GitHub Pages
At the moment we just have our site running locally (note that in the image above, the web address was localhost:9999). To actively host it online, we can use GitHub Pages.
GitHub Pages is a free hosting service provided by GitHub that takes files from a repository and hosts them as a static website.
But to push our changes to the website, we need to set up the associated GitHub Action.
GitHub Actions provides automated workflows to build and deploy websites to hosting platforms whenever code changes are pushed to a repository.
In other words, GitHub Actions works with GitHub Pages by automatically building your site’s files and pushing them to a dedicated branch, which GitHub Pages then serves as a live website at username.github.io/repository-name.
First, let’s create a deployment workflow for our Action. From your project root on the terminal type:
mkdir -p .github/workflows
and then opening up the file in your editor, replace the contents with:
name: deploy (only on push to main branch)
on:
  push:
    branches:
      - "main"
jobs:
  build-docs:
    runs-on: ubuntu-latest
    permissions: write-all
    steps:
      - name: checkout
        uses: actions/checkout@v3
        with:
          fetch-depth: 0
      - name: set up Python
        uses: actions/setup-python@v4
        with:
          python-version: '>=3.10'
      - name: install mkdocs and dependencies
        run: |
            pip install -r requirements.txt
            mkdocs --version
      - name: build docs
        run: mkdocs build --strict
      - name: deploy docs
        run: mkdocs gh-deploy --force
This will re-deploy the website when changes have been commited to the main branch.
So now the basic structure of your folder should be:
my-mkdocs-site/
├── .github/
│   └── workflows/
│       └── deploy.yml
├── docs/
│   └── index.md
├── venv/
├── .gitignore
├── mkdocs.yml
└── requirements.txt
Let’s then commit our basic set-up to GitHub:
git add .
git commit -m "initial commit of basic website"
git push origin main
The website will not be built this time round, so don’t worry if an error happens.
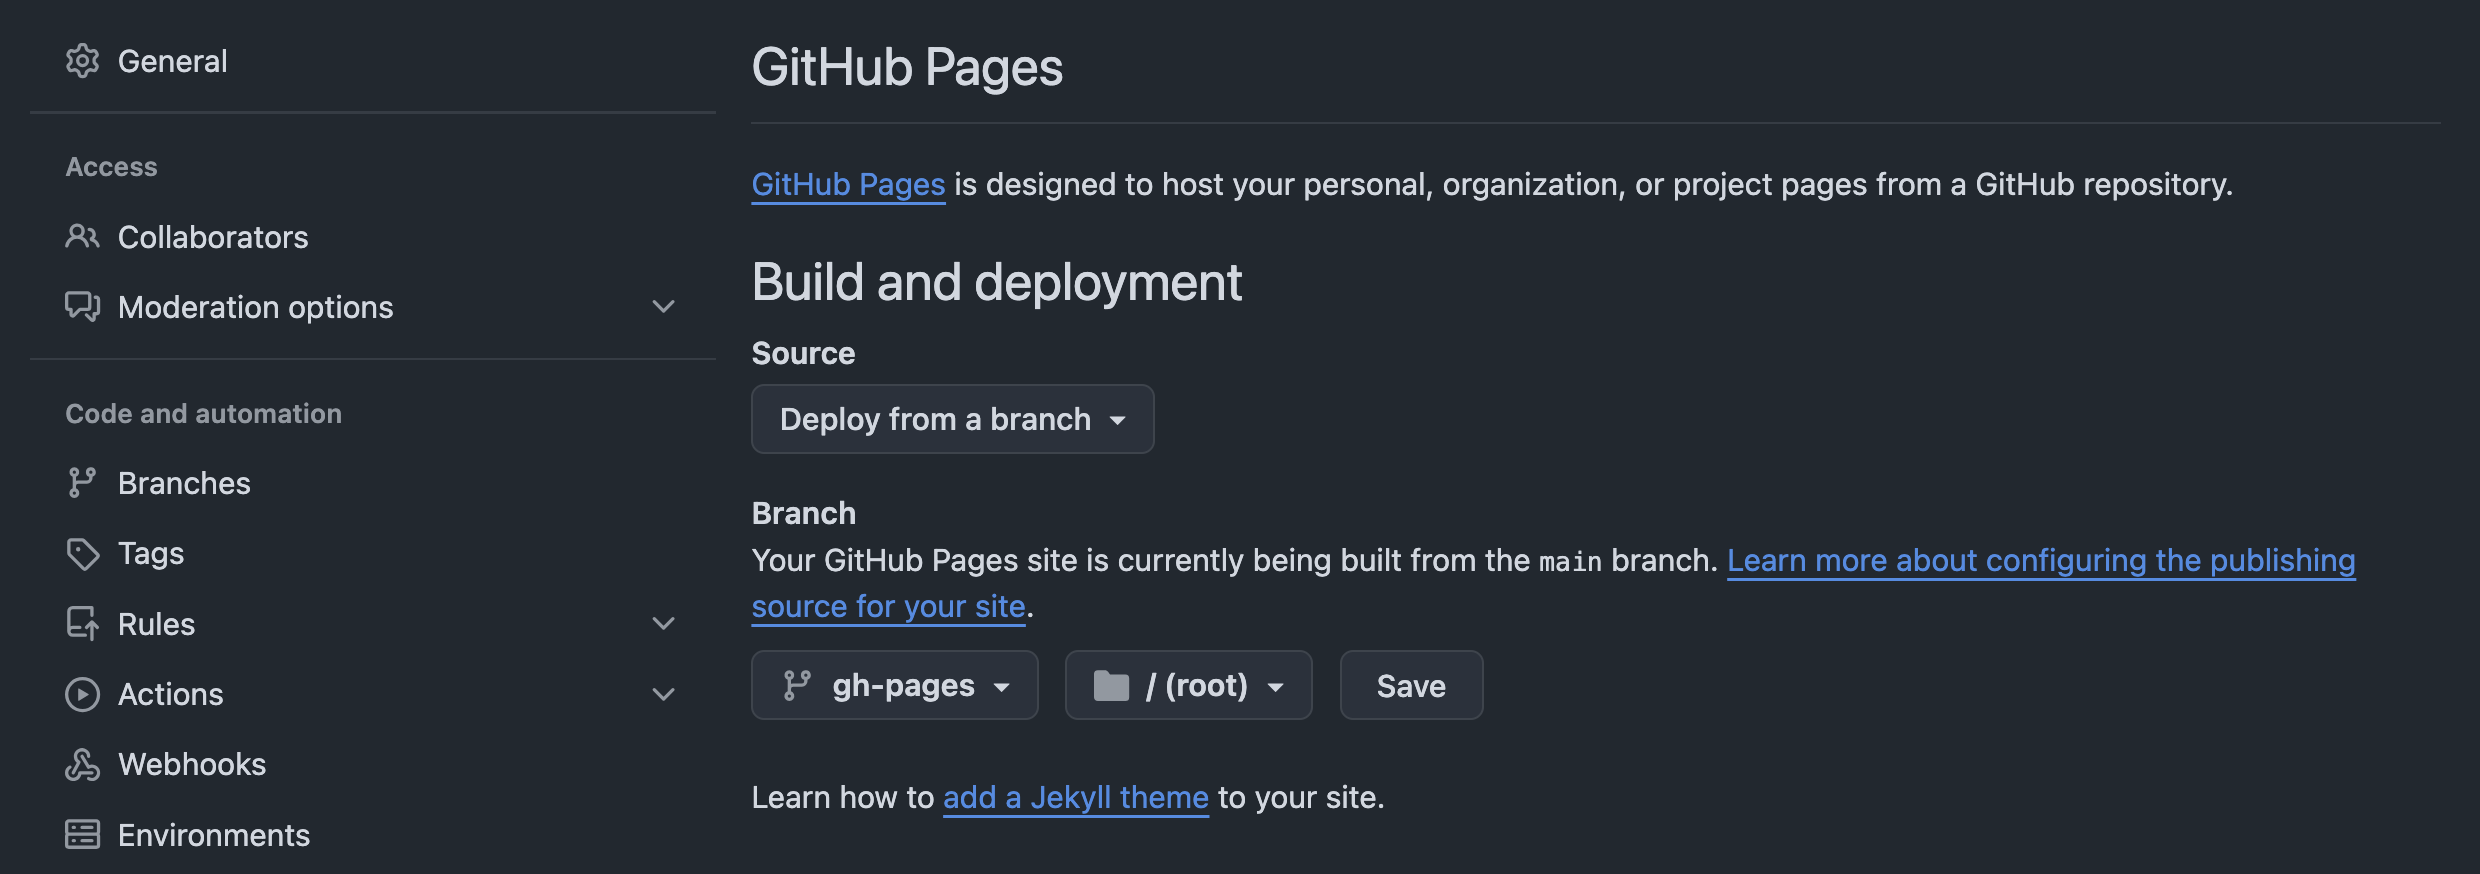
We need to now specifically set-up our repository on GitHub to publish the contents to our GitHub site through GitHub Pages.
To do this do the following:
- Go to your repository on GitHub
- Go to Settings → Pages
- Set source to “Deploy from a branch”
- Select
gh-pagesbranch and/ (root)

Then make any change locally and re-commit:
git add .
git commit -m "testing commit"
git push origin main
If you didn’t see the
gh-pagesoption, and onlymainafter the initial commit, then selectmainand make a second commit. You should then see thegh-pagesoption the second time round.
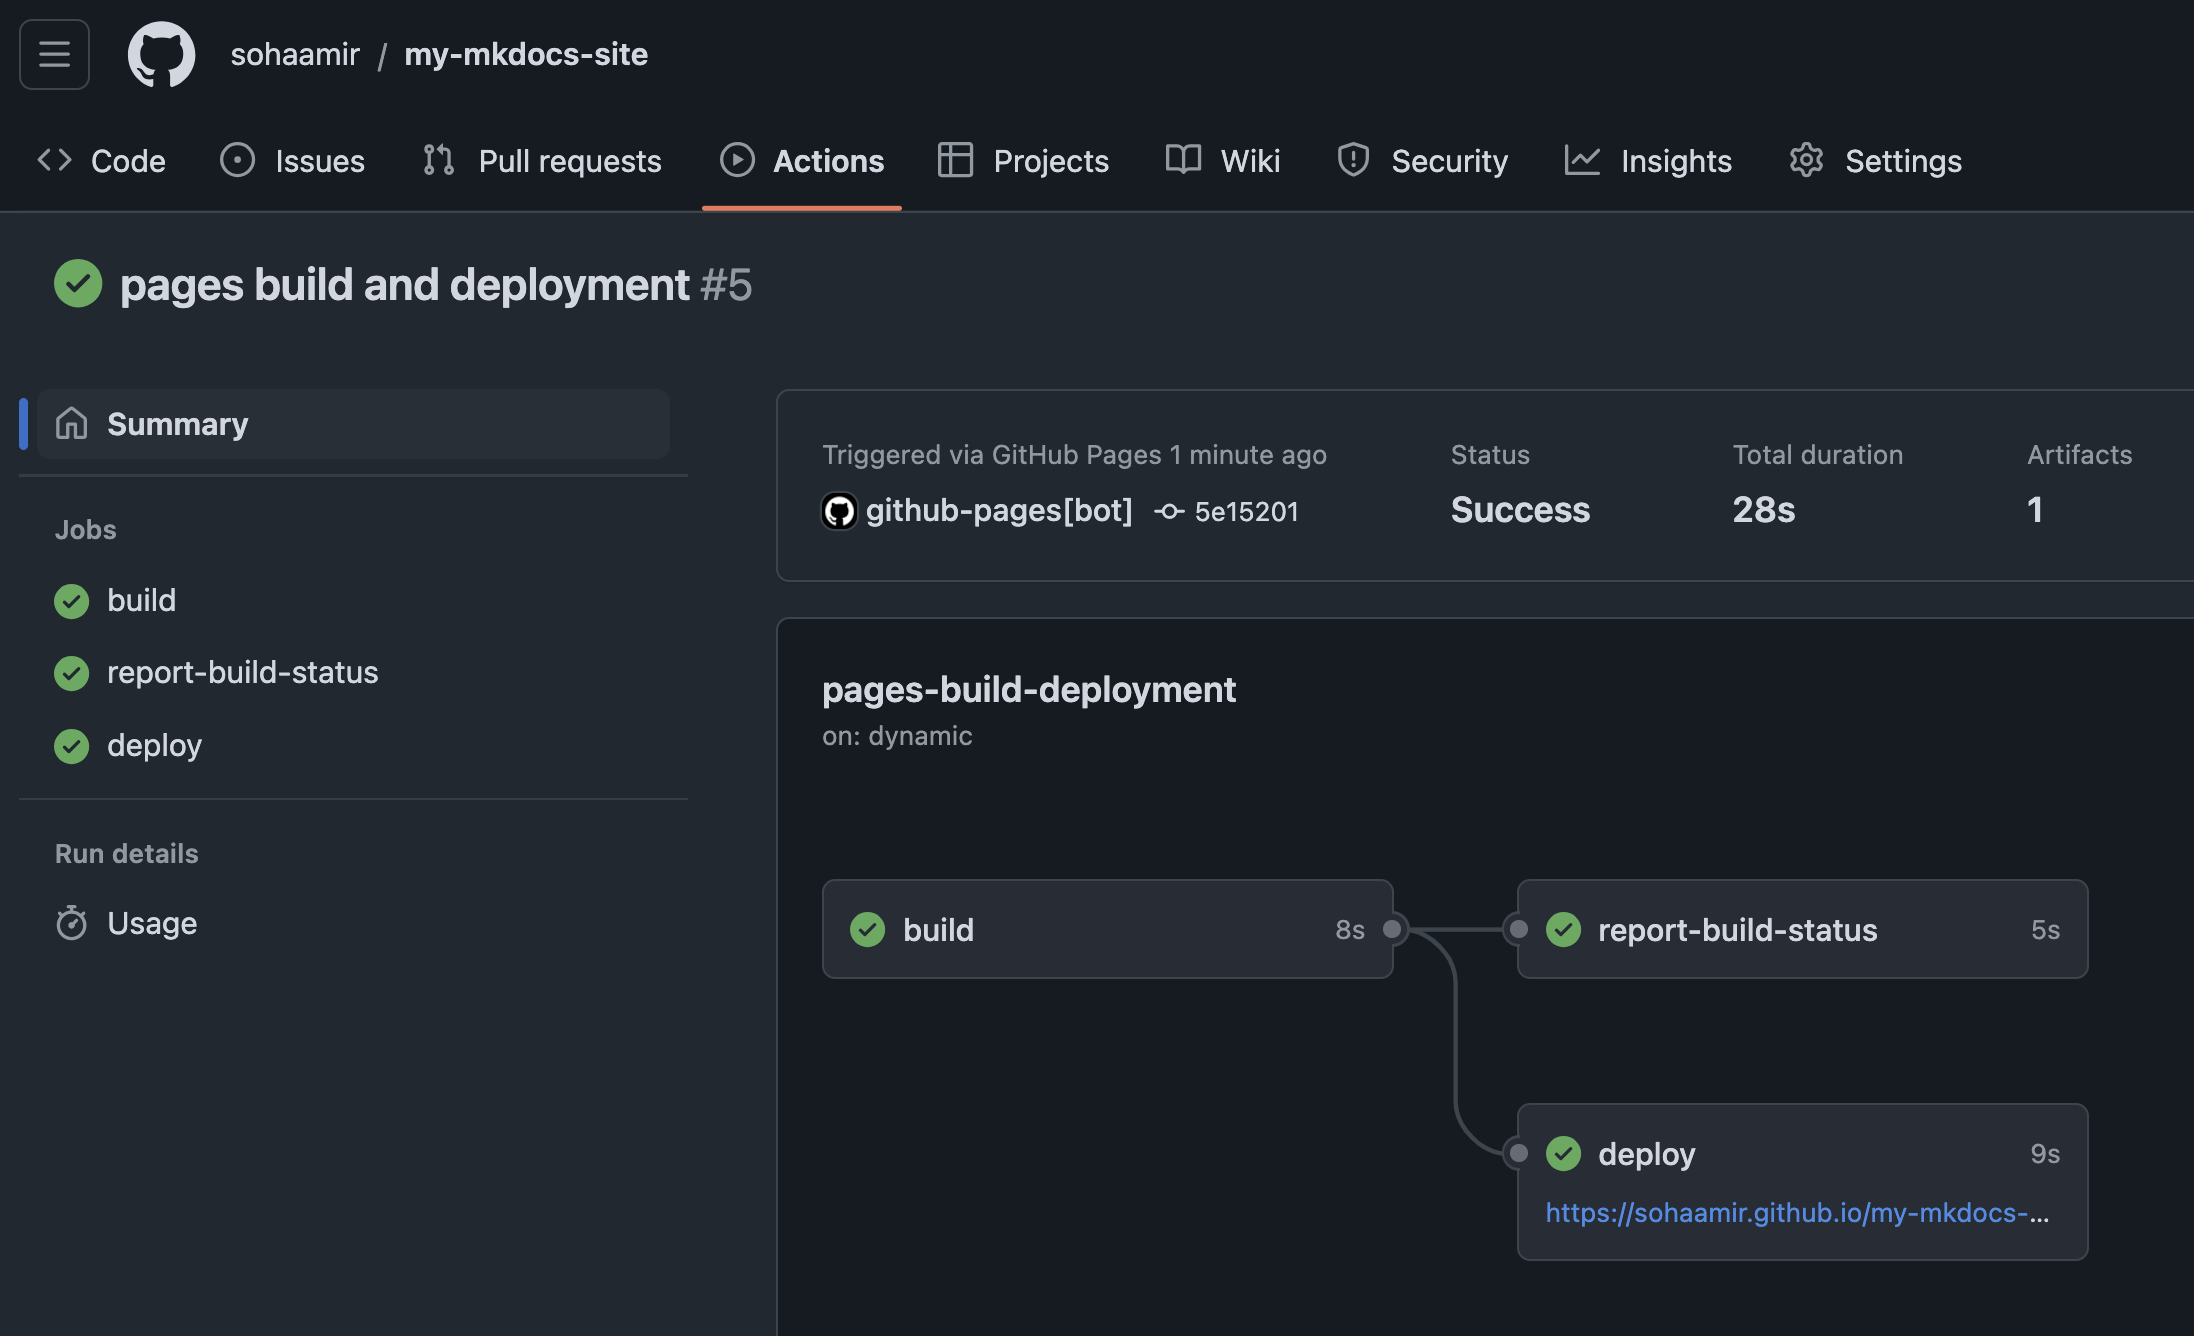
Your website should now be deployed! You can go to your newly found website on GitHub by:
- Going to ‘Actions’ and selecting the most recent ‘pages build and deployment’ workflow
- Clicking on the link provided in the ‘deploy’ box

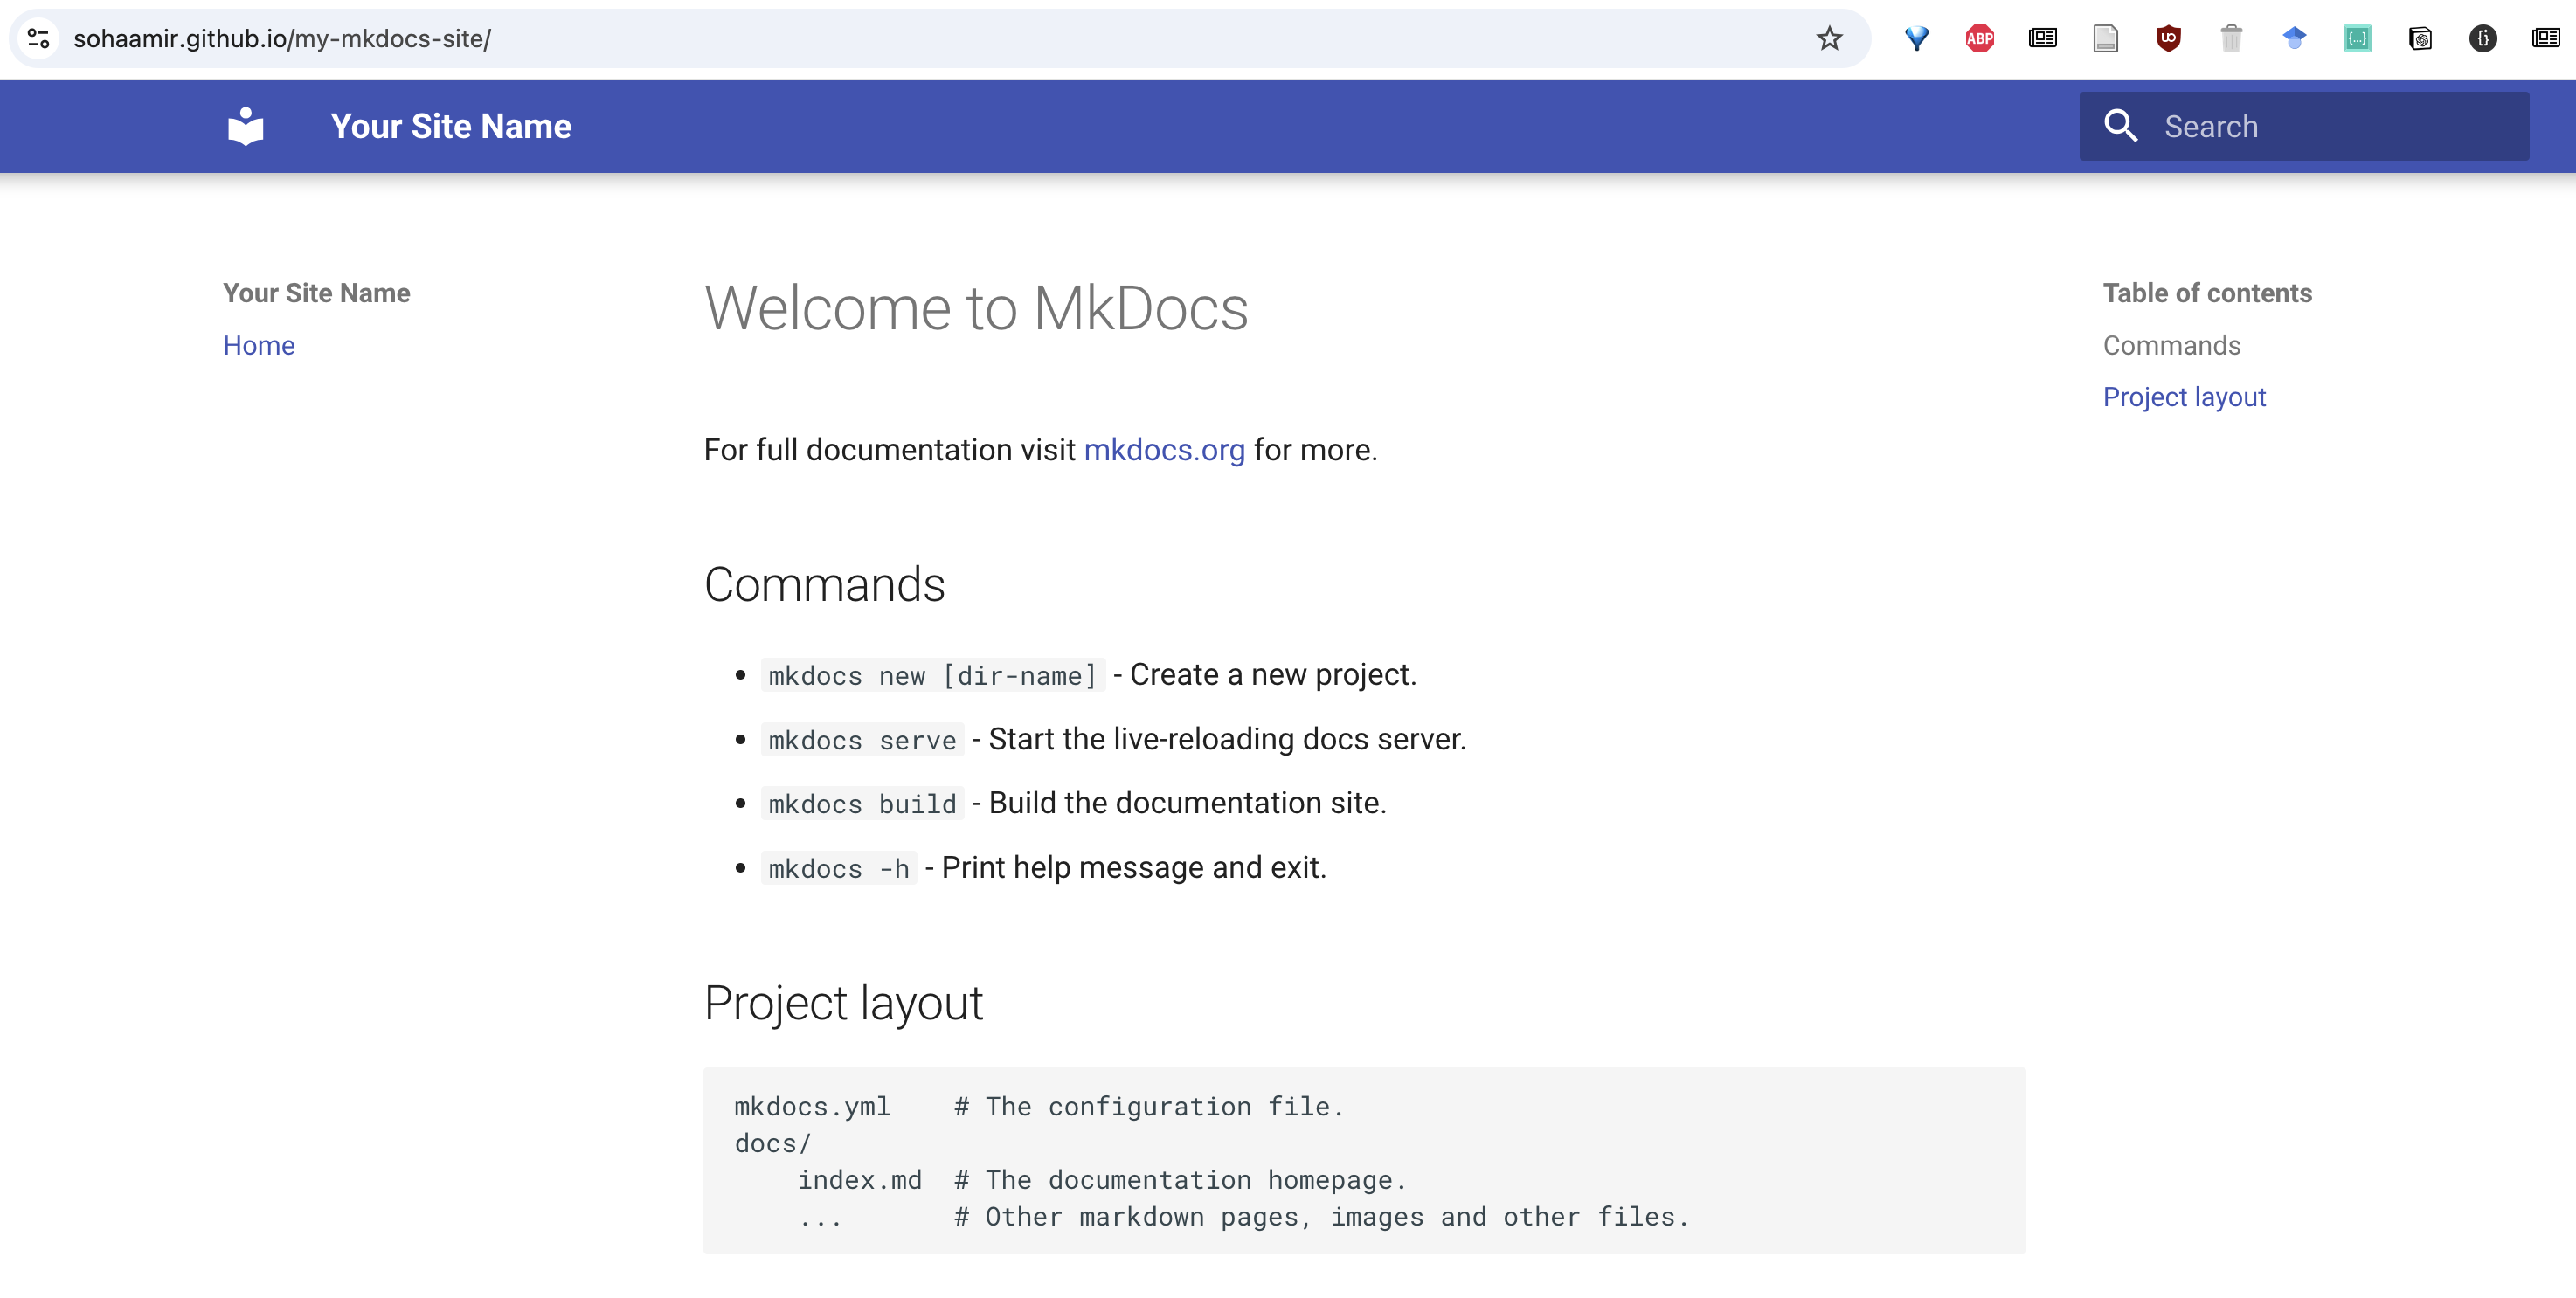
And voila, your website is now hosted on GitHub Pages!

Note that the website’s URL will follow the general structure of https://username.github.io/repository-name.
In Part 2, I will cover how to customise your website using MkDocs, including developing your website’s structure, adding notes and other media, as well as other fun stuff!